
Learn pastel painting for beginners with simple step-by-step instructions, essential materials, blending techniques, easy painting ideas, and practical tips.
Pastel Painting for Beginners: A Step-by-Step Guide
Pastel painting is a beginner-friendly art technique that uses soft or hard pastel sticks to create colorful drawings with smooth blending, rich textures, and expressive marks. Unlike watercolor or acrylic painting, pastels can be applied directly to paper without mixing them with water or liquid paint.
Whether you want to create a simple landscape, a colorful sunset, or a still-life composition, pastel painting is a great way to explore color and creativity.
Watercolor Painting for Beginners: A Complete Step-by-Step Guide
In this guide, you will learn about different types of pastels, the materials you need, basic pastel techniques, and how to create your first pastel painting step by step.
What Is Pastel Painting?
Pastel painting is an art technique that uses pastel sticks made from colored pigments and a binding material. Artists apply pastels directly to a suitable surface, building colors through strokes, layering, and blending.
Although it is commonly called pastel painting, the process often combines drawing and painting techniques. You can create sharp lines, soft transitions, textured surfaces, and vibrant areas of color using the same medium.
Pastel is especially useful for beginners because it allows you to work directly with color without preparing liquid paints or brushes.
Types of Pastels for Beginners
Before starting, it is helpful to understand the main types of pastels. Each type produces a different texture and requires a slightly different approach.
1. Soft Pastels
Soft pastels contain a high proportion of pigment and relatively little binder. They produce rich colors and blend easily.
Best for:
- Smooth color transitions
- Landscapes and skies
- Soft backgrounds
- Expressive and textured artwork
Soft pastels can produce dust, so work gently and keep the working area clean.
2. Hard Pastels
Hard pastels have a firmer texture than soft pastels. They are useful for drawing outlines, adding details, and making controlled strokes.
Best for:
- Initial sketches
- Fine lines
- Small details
- Layering under softer pastels
3. Oil Pastels
Oil pastels contain pigment mixed with a waxy or oily binder. They feel creamy and can create bold, smooth marks.
Best for:
- Bright, solid colors
- Bold strokes
- Color layering
- Textured artwork
Oil pastels behave differently from soft and hard pastels. They do not blend in exactly the same way and generally should not be treated as a dry, powdery medium.
4. Pastel Pencils
Pastel pencils contain pastel material inside a pencil-shaped casing. They provide more control for small details and precise lines.
Best for:
- Fine details
- Small areas
- Outlines
- Detailed subjects
Which Pastel Should a Beginner Choose?
For a first project, choose either a small set of soft pastels or a set of oil pastels. Soft pastels are excellent for blending and atmospheric effects, while oil pastels are convenient for bold, colorful work.
You do not need to buy every type at once. Start with one medium and learn how it behaves before expanding your collection.
Materials Needed for Pastel Painting
You can begin with a few basic materials.
- Pastels: Choose soft pastels or oil pastels for your first project.
- Pastel paper: Use paper with enough texture to hold the pastel pigment.
- Drawing paper: Suitable textured paper can work for simple practice, although very smooth paper may not hold many layers.
- Pencil: Use a light pencil for a basic outline if needed.
- Eraser: A kneaded eraser can help lift some dry pastel marks.
- Blending tools: Your fingers, a paper blending stump, or a soft cloth may be useful, depending on the pastel type.
- Scrap paper: Test colors and blending techniques before applying them to your artwork.
- Fixative: An artist’s fixative may help protect some finished dry pastel work, but always follow the product instructions and test it first because it can alter colors.
Art Supplies for Beginners: Essential Drawing & Painting Materials You Need
For soft pastels, choose a well-ventilated workspace, avoid blowing dust away, and wash your hands after working. Keep pastel dust away from food and drinks. Children should use age-appropriate materials with adult supervision.
How to Start Pastel Painting Step by Step
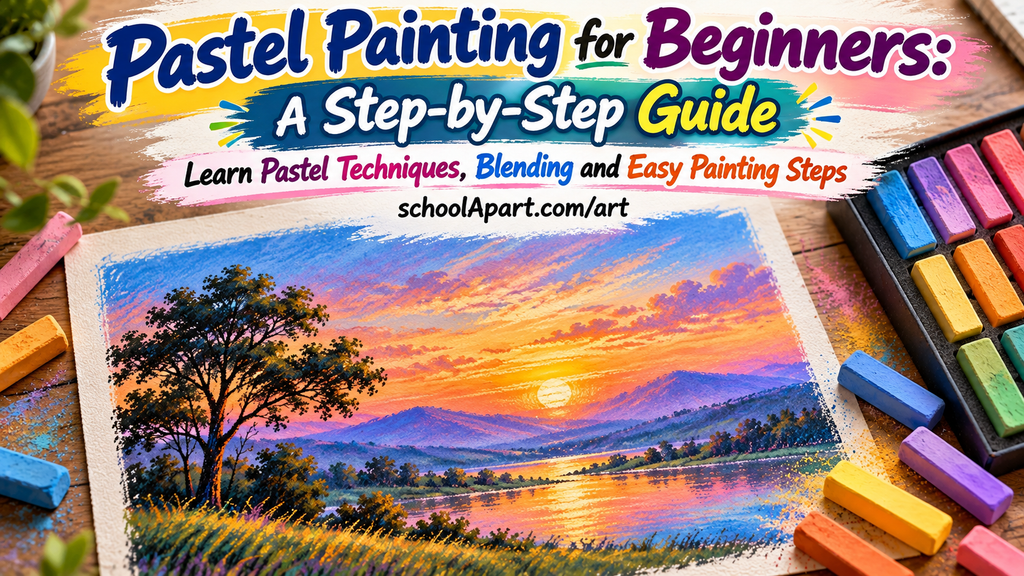
The easiest way to begin is with a simple landscape. A landscape lets you practice large color areas, blending, layering, and basic shapes without needing complicated details.
For this example, you will create a simple sunset landscape with a sky, distant hills, a foreground, and a few trees.
Step 1: Prepare Your Paper
Place your pastel paper on a flat surface. If it moves while you work, secure the edges with low-tack tape.
Choose a paper with some texture. The texture helps hold pastel pigment and makes it easier to build layers.
If you are using soft pastels, keep a scrap sheet nearby for testing colors. If you are using oil pastels, test how firmly you need to press to create an even mark.
Step 2: Make a Simple Outline
Lightly sketch the main shapes of your landscape.
Mark:
- The horizon line
- The general shape of the distant hills
- The foreground
- The position of any trees or other simple objects
Keep the outline light. Too much pencil pressure can leave marks that are difficult to cover with pastel.
You can also skip the pencil and begin directly with broad pastel shapes if you prefer a more expressive style.
Step 3: Add the Base Colors
Start with the largest areas of the painting.
For a sunset landscape, you might use:
- Light yellow near the horizon
- Orange and pink in the middle of the sky
- Blue or violet in the upper sky
- Green, brown, or violet for the land
Apply the colors lightly at first. It is easier to deepen a color later than to correct an area that has become too heavily covered.
Do not worry about perfect blending at this stage. Focus on placing the main colors in the correct areas.
Step 4: Blend the Sky
Now soften the transitions between the sky colors.
With soft pastels, gently blend adjoining colors using a clean finger, blending stump, or another suitable tool. Work in small areas and clean the tool when changing colors.
With oil pastels, use light overlapping strokes or a suitable blending tool to merge colors. Avoid pressing too hard too early, because thick layers can become difficult to adjust.
Try to create a gradual transition rather than mixing every color into one uniform shade. Leaving some visible strokes can make the sky more interesting.
Step 5: Add the Distant Hills
Use a cooler or darker color to create distant hills below the sky. Blue, violet, muted green, or brown can work well, depending on your chosen color scheme.
Keep the distant shapes relatively simple. You can make them slightly softer or less detailed than objects in the foreground.
This difference helps create a sense of distance in your landscape.
Step 6: Build the Foreground
Add a darker layer for the foreground. You can use green, brown, blue, or violet.
Use broader strokes to create the main land shape. Then add a few variations in color to suggest grass, uneven ground, or shadows.
Avoid filling the entire foreground with one flat color. A few lighter and darker areas can make it look more natural.
Step 7: Add Trees and Details
Use a dark pastel to draw the basic shape of a tree trunk and branches. Add foliage with short strokes, dots, or small patches of color.
Keep the details simple. A beginner’s landscape does not need dozens of leaves or perfectly drawn branches.
Add a few final highlights where the sunset light might touch the landscape. Use a lighter color sparingly so the highlights remain noticeable.
Step 8: Review and Finish Your Painting
Step back and look at the whole composition.
Ask yourself:
- Is the main subject easy to see?
- Are the sky and land clearly separated?
- Do the colors work well together?
- Are there areas that need more contrast?
- Have I added too many details?
Make only the adjustments that improve the overall result. You do not need to fill every empty space.
For soft pastels, handle the finished artwork carefully because loose pigment can smudge. Store it with a protective cover or suitable framing arrangement. For oil pastels, follow the material manufacturer’s guidance for storage and protection.
Basic Pastel Painting Techniques
Learning a few techniques will help you create different textures and effects.
1. Layering
Layering means applying one color over another. It helps you build depth, adjust color, and create more complex surfaces.
Begin with light layers and gradually add darker or stronger colors. On textured paper, layering can produce interesting effects because small areas of the surface remain visible.
2. Blending
Blending softens the boundary between two colors. It is useful for skies, clouds, skin tones, and other areas where you want gradual transitions.
Blend gently and avoid overworking the surface. Too much blending can make colors muddy or remove the texture that gives pastel artwork its character.
3. Hatching and Cross-Hatching
Hatching uses parallel lines to create texture or suggest shading. Cross-hatching adds another set of lines across the first set.
These techniques are particularly useful with hard pastels and pastel pencils, although directional strokes can also be used with other pastel types.
4. Scumbling
Scumbling involves making loose, irregular strokes over an existing layer. The underlying color remains partly visible, creating a textured effect.
You can use scumbling to suggest grass, foliage, rough surfaces, or movement in clouds.
5. Highlighting
Highlights are lighter areas that help show where light falls on an object. Add them after establishing the main color and shadow areas.
Use a lighter pastel to emphasize selected edges, surfaces, or focal points. Too many highlights can make the artwork look flat rather than three-dimensional.
How to Blend Pastel Colors Without Making Them Muddy
Color blending is one of the most useful pastel skills, but beginners sometimes mix too many colors together.
Follow these tips:
- Start with a small number of related colors.
- Apply colors lightly before adding more pigment.
- Blend only where you want a smooth transition.
- Clean your fingers or blending tool between colors.
- Leave some strokes visible to preserve texture.
- Add highlights and darker accents near the end.
For example, yellow and orange can create a warm transition in a sunset. Adding a small amount of pink or violet can make the sky more varied. However, blending every color together may reduce the clarity of the individual colors.
Practice each combination on scrap paper before using it in your main artwork.
Common Pastel Painting Mistakes Beginners Should Avoid
Pressing Too Hard
Heavy pressure can fill the paper’s texture quickly and leave little room for additional layers. Start with light strokes and increase pressure only when needed.
Using the Wrong Paper
Very smooth paper may not hold enough dry pastel pigment for repeated layering. Choose a surface designed for pastels or test textured paper before starting a larger project.
Blending Every Area
Not every part of a painting needs to be smooth. Visible strokes can suggest texture, movement, and form.
Using Too Many Colors
A large palette can make it harder to control the overall color scheme. Begin with a limited selection and add colors only when they serve a purpose.
Adding Details Too Early
If you draw small details before establishing the larger shapes, you may need to redo them later. Work from large color areas toward smaller details.
Ignoring Safety and Storage
Dry pastel dust should not be blown into the air or inhaled. Work carefully, clean up gently, and store the artwork so it does not rub against other surfaces.
Simple Pastel Painting Ideas for Beginners
Once you understand the basic techniques, try these easy subjects:
- Sunset sky: Practice blending warm and cool colors.
- Simple landscape: Use hills, a sky, and a foreground to learn layering.
- Fruit still life: Explore basic shapes, highlights, and shadows.
- Flowers in a vase: Practice curved strokes and contrasting colors.
- Mountain scene: Use layered shapes to create depth.
- Cloud study: Experiment with soft edges and visible strokes.
- Color gradient: Blend two or three colors into a gradual transition.
- Simple tree: Practice texture using short, directional marks.
Choose one subject and repeat it several times. Repetition helps you understand how the pastel medium responds to different amounts of pressure and blending.
How to Practice Pastel Painting at Home
You do not need a large art studio to improve. A short, regular practice routine can help you build confidence.
Try this simple routine:
- First 5 minutes: Test strokes and pressure on scrap paper.
- Next 10 minutes: Practice blending two or three colors.
- Next 10 minutes: Draw a simple object or landscape.
- Final 5 minutes: Review the result and note one thing to improve.
You can change the timing to suit your schedule. The important part is to practice specific skills rather than trying to complete a perfect painting every time.
Keep your early attempts. Comparing older and newer work helps you notice improvements in color control, blending, composition, and confidence.
Pastel Painting vs. Other Painting Techniques
Pastel painting differs from watercolor and acrylic painting mainly in the materials and application process.
- Pastel painting: Uses pastel sticks or pencils applied directly to a surface. It is useful for direct color application, blending, and expressive strokes.
- Watercolor painting: Uses water-based paint that is diluted and applied with brushes. It is known for transparent washes and flowing effects.
- Acrylic painting: Uses water-based acrylic paint that can create opaque layers, textures, and many different finishes.
Drawing vs Painting: What’s the Difference? A Complete Comparison for Beginners
Each medium has its own advantages. Choose pastels if you want to work directly with color and explore blending without preparing liquid paint.
If you want to compare techniques in more detail, read SchoolApart’s guides to Watercolor Painting for Beginners and Acrylic Painting for Beginners.
Final Tips for Pastel Painting Beginners
Pastel painting becomes easier when you focus on a few fundamentals: choose suitable paper, begin with simple shapes, build colors gradually, and practice blending without overworking the surface.
You do not need expensive materials or advanced drawing skills to get started. A small set of pastels, suitable paper, and a simple subject are enough for your first attempt.
Start with a sunset, a tree, or a basic still life. Learn from each painting, keep experimenting with color, and gradually move on to more detailed subjects.
FAQs
1. Frequently Asked Questions
1. Is pastel painting good for beginners?
Yes. Pastel painting is suitable for beginners because colors can be applied directly to paper, and you can practice blending, layering, and simple shapes without preparing liquid paints.
2. What materials do I need for pastel painting?
You need pastels, suitable paper, and a flat working surface. A pencil, eraser, blending tool, and protective storage materials can also be useful.
3. Which pastels are best for beginners?
Soft pastels are excellent for blending and expressive artwork. Oil pastels are useful for bold colors and creamy strokes. Choose one type based on the effect you want to create.
4. What is the difference between soft pastels and oil pastels?
Soft pastels are generally dry and powdery, making them suitable for blending and layered textures. Oil pastels have a waxy or oily binder and produce thicker, more solid marks.
5. Can I use normal paper for pastel painting?
You can experiment with textured drawing paper, but very smooth paper may not hold enough pigment for multiple layers. Paper designed for pastels is generally a better choice.
6. How do you blend pastel colors?
Apply adjoining colors lightly, then blend them gently with a suitable tool. Clean the tool between colors and avoid excessive blending, which can make the result muddy.
7. Can I blend oil pastels with my fingers?
You can use your fingers gently for some oil pastel techniques, but the result depends on the product and the thickness of the layers. A suitable blending tool can offer more control.
8. Do I need a brush for pastel painting?
No. Pastels are applied directly to the surface. Brushes are optional and may be used for specific techniques or effects, depending on the medium.
9. What is the easiest pastel painting for beginners?
A sunset, simple landscape, color gradient, or basic fruit still life is a good starting point because each subject uses simple shapes and a manageable number of colors.
10. How do I prevent pastel colors from becoming muddy?
Use a limited color palette, apply thin layers, clean blending tools regularly, and blend only where you want smooth transitions. Preserve some visible strokes for texture.
11. Can children learn pastel painting?
Yes, with age-appropriate materials and suitable supervision. Keep dry pastel dust away from the face, avoid blowing dust into the air, and follow product safety instructions.
12. Is pastel painting the same as drawing?
They overlap, but they are not exactly the same. Pastels can be used for both drawing-like marks and painting-like color areas, depending on the technique and the artist’s approach.
13. Do pastel paintings need a fixative?
Some dry pastel artworks may benefit from an artist’s fixative, but it is not always necessary and can change the appearance of the colors. Follow the manufacturer’s instructions and test it first.
14. How can I protect a finished pastel painting?
Handle it carefully, avoid rubbing the surface, and store it with a protective cover. Framing with a suitable arrangement that keeps the artwork from touching the glazing can also help protect it.
15. How often should beginners practice pastel painting?
Regular short sessions are useful. Try practising color blending, layering, and simple subjects several times a week, then review your work to identify areas for improvement.

Leave a Reply