

Learn oil painting for beginners with a step-by-step tutorial, essential supplies, basic techniques, color mixing tips, and easy painting ideas.
Oil Painting for Beginners
Oil painting is a painting technique that uses pigments mixed with drying oils to create rich colors, smooth blends, and detailed artwork. It is popular for portraits, landscapes, still-life paintings, and many other subjects.
For beginners, oil painting may seem difficult because the paint dries slowly and requires some understanding of layering, brush control, and color mixing. However, you can learn the basics by starting with a simple subject and a few essential materials.
Watercolor Painting for Beginners: A Complete Step-by-Step Guide
In this guide, you will learn what oil painting is, which materials you need, how to prepare your workspace, and how to create your first oil painting step by step.
What Is Oil Painting?
Oil painting is an art technique in which pigments are suspended in a drying oil, commonly linseed oil. The paint can be applied in thin or thick layers, depending on the desired effect.
One of the main characteristics of oil paint is its relatively slow drying time. This gives artists more time to blend colors, adjust shapes, and refine details before the paint becomes touch-dry.
Oil paints can produce vibrant colors, subtle transitions, textured brushstrokes, and a wide range of finishes. They are suitable for both realistic and expressive styles.
Why Should Beginners Learn Oil Painting?
Oil painting offers several benefits for people who want to develop their painting skills.
- Longer working time: Many oil paints remain workable for hours or longer, depending on the pigment, thickness, and conditions.
- Smooth blending: You can blend colors gradually to create soft transitions.
- Rich color effects: Oil paints offer a wide range of colors and can create strong contrast.
- Layering possibilities: Artists can build up color and detail over multiple painting sessions.
- Versatile techniques: Oil paint can be used for thin applications, textured brushwork, and detailed artwork.
Oil painting also requires patience. Learning to manage paint consistency, drying time, and layers is part of the process.
Materials Needed for Oil Painting
You do not need a large collection of supplies to begin. Start with a small, manageable set.
Art Supplies for Beginners: Essential Drawing & Painting Materials You Need
1. Oil Paints
Choose a basic set of artist-quality or student-grade oil paints. A limited palette is easier to manage than dozens of colors.
Useful starting colors include:
- Titanium white
- Yellow ochre
- A warm yellow
- A red
- Ultramarine blue
- Burnt sienna
- A dark brown or another suitable dark color
The exact selection can vary. You can mix many useful colors from a small palette, although some shades will require additional pigments.
2. Brushes
Choose a few brushes in different sizes.
- Flat brushes: Useful for broad strokes, edges, and larger areas.
- Round brushes: Helpful for lines, small shapes, and details.
- Filbert brushes: Useful for rounded strokes and soft blending.
Brushes made for oil painting are a good starting point. Follow the manufacturer’s cleaning and care instructions.
3. Painting Surface
Oil paint needs a suitable, properly prepared surface. Beginners can use a pre-primed canvas, canvas panel, or oil-painting paper designed for the medium.
Do not apply oil paint directly to ordinary unprimed paper or raw canvas. The surface should be appropriately prepared to help protect the support and provide a suitable painting ground.
4. Palette
A palette provides a surface for arranging and mixing colors. You can use a palette designed for oil painting or another surface specifically suitable for the materials.
Arrange colors in a consistent order so they are easier to find while painting.
5. Palette Knife
A palette knife is useful for mixing paint and can also create textured marks. It is optional for a first painting, but it becomes helpful as you learn color mixing.
6. Cleaning Materials
You will need an appropriate way to clean your brushes. Many artists use a suitable brush cleaner or a solvent intended for oil painting.
Some oil-painting mediums and solvents produce harmful vapors. Use them only according to the label, maintain good ventilation, and keep them away from flames and heat. Never pour solvents down household drains.
You can also use a solvent-free approach with appropriate oil-painting materials, although you will still need to clean brushes safely.
7. Protective Clothing and Workspace Supplies
Wear clothes that can tolerate paint stains and protect your working surface. Keep paper towels or suitable cleaning cloths nearby, and organize materials so they cannot be knocked over.
Dispose of paint-contaminated rags safely according to the product instructions and local guidance. Some oil-soaked materials can heat up and catch fire if stored improperly.
Understanding Basic Oil Painting Techniques
Before starting your first painting, learn a few techniques that make the process easier.
1. Color Mixing
Color mixing means combining paints to create a new color or adjust an existing one.
Start with small amounts of paint. Add one color gradually to another rather than mixing large quantities immediately.
For example:
- Blue and yellow can create green.
- Red and yellow can create orange.
- Blue and red can create violet.
- White can lighten many colors.
- A small amount of a complementary color can reduce a color’s intensity.
The exact result depends on the pigments you use. Test your mixtures on a scrap surface or a small area before applying them to the main painting.
2. Brushwork
Brushwork refers to the marks made by a brush. Different brush sizes, shapes, directions, and pressures create different effects.
Broad strokes are useful for large areas. Smaller strokes can add texture and details. Practice moving the brush in different directions to see how each mark changes the appearance of the paint.
3. Blending
Blending creates a gradual transition between colors. It can be useful for skies, rounded objects, and soft shadows.
Place two colors next to each other and gently work along their boundary with a clean or suitable brush. Avoid repeatedly brushing the same area, because excessive blending can make the colors look dull.
4. Layering
Layering means applying paint over an earlier layer. Artists often begin with broad shapes and general colors, then develop more detail as the painting progresses.
Oil paintings may require different layers to dry before additional work. Follow appropriate oil-painting practices rather than assuming every layer will be ready after a fixed number of hours.
5. Light and Shadow
Light and shadow help objects appear three-dimensional.
Identify the direction of the light source. Areas facing the light are generally lighter, while areas turned away from the light tend to be darker.
You do not need to use pure white and black for every highlight and shadow. Adjusting the value and temperature of nearby colors can create more natural results.
How to Start Oil Painting Step by Step
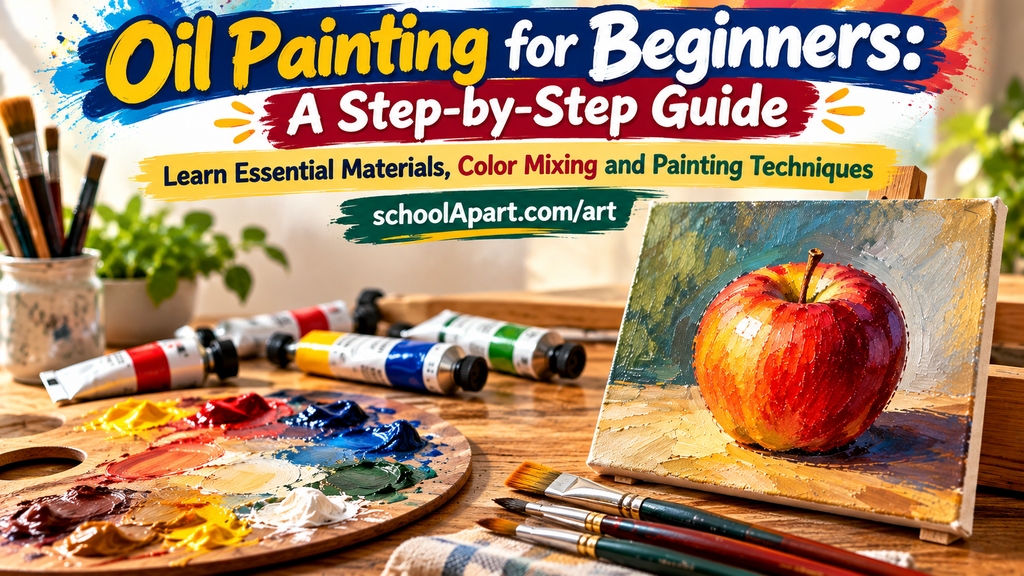
For your first project, paint a simple still life featuring an apple or another rounded fruit on a table. This subject helps you practise basic shapes, color mixing, highlights, and shadows without requiring complicated details.
Step 1: Prepare Your Workspace
Choose a stable table in a well-ventilated area with enough space for your painting, palette, brushes, and cleaning materials.
Secure your prepared canvas or painting panel so it does not move. Keep food and drinks away from your materials, and make sure your workspace is safe for the products you are using.
Step 2: Observe Your Subject
Place a piece of fruit on a table and observe its overall shape.
Notice:
- The outline of the fruit
- The direction of the light
- The brightest area
- The darkest shadow
- The color of the background and surface
Spend a few minutes observing before applying paint. This helps you understand the subject instead of painting from memory alone.
Step 3: Sketch the Main Shapes
Use a light pencil or a suitable drawing method to indicate the fruit, the table edge, and the main shadow.
Keep the drawing simple. Avoid adding small details at this stage.
Check the size and position of the fruit against the available space. If the outline looks wrong, it is easier to adjust it before applying paint.
Step 4: Choose a Limited Color Palette
Select a few colors that represent the fruit, the background, and the shadow.
For a red apple, you might use a red, yellow ochre, ultramarine blue, white, and burnt sienna. The exact palette depends on the appearance of your subject.
Mix a few variations before you start:
- A lighter color for the area facing the light
- A middle color for the main body
- A darker mixture for the shadow
- A background color
- A color for the cast shadow on the table
This preparation helps you paint more confidently and reduces unnecessary mixing during the process.
Step 5: Paint the Background and Large Areas
Begin with the larger shapes, such as the background and table. Apply the paint with broad, controlled strokes.
Next, block in the main color of the fruit. Focus on covering the correct areas and establishing the overall composition.
Do not try to make every edge perfect. The purpose of this stage is to organize the large color areas.
Step 6: Add Light and Shadow
Look again at the direction of the light.
Apply a darker color to the shadow side of the fruit and the cast shadow on the table. Keep the shadow connected to the object so it does not appear to float.
Add a lighter color to the area facing the light. Blend only where the transition needs to be soft, and leave some brushstrokes visible if they help describe the form.
Step 7: Refine the Shape and Color
Compare the painted fruit with the real object. Adjust its outline, proportions, and color where necessary.
Use smaller brushes for selected corrections, but avoid adding details everywhere. A few well-placed adjustments often make a greater difference than many tiny strokes.
Step back from the painting occasionally to judge the overall effect.
Step 8: Add Final Highlights and Details
When the main shapes and shadows are working well, add a few final details.
You might refine the stem, strengthen a small shadow, or place a restrained highlight on the fruit. Avoid making every part equally bright or equally detailed.
The highlight should support the direction of the light rather than look like an unrelated white mark.
Step 9: Let the Painting Dry Safely
Oil paint dries through a chemical process, and drying time varies considerably with the pigment, thickness, medium, temperature, and airflow.
Keep the painting in a safe, ventilated location away from dust, pets, and accidental contact. Do not stack materials against a wet painting or assume that it is ready to varnish when the surface first feels dry.
Follow the manufacturer’s guidance for drying, handling, and any later varnishing.
Common Oil Painting Mistakes Beginners Should Avoid
Using Too Much Paint Too Soon
A thick layer can make it harder to correct shapes and can take a long time to dry. Begin with controlled applications and add more paint when needed.
Mixing Too Many Colors Together
Combining many pigments without a clear plan can produce dull or muddy mixtures. Start with a limited palette and mix small amounts.
Ignoring Light and Shadow
Painting an object with one flat color can make it look less three-dimensional. Observe where the light falls and use lighter and darker variations to describe the form.
Overworking the Painting
Repeatedly brushing an area can disturb the paint and reduce color clarity. Make deliberate strokes, pause, and assess the result before continuing.
Using an Unsuitable Surface
Oil paint requires a properly prepared support. Use a surface designed for oil painting rather than applying it directly to ordinary unprimed paper.
Rushing the Drying Process
Oil paint does not dry at the same speed as every water-based paint. Allow adequate time and follow appropriate handling and storage guidance.
Neglecting Safety
Keep painting materials away from children when not in use, use solvents only as directed, ventilate the workspace, and dispose of contaminated rags safely. Never use food containers to store painting chemicals.
Easy Oil Painting Ideas for Beginners
Once you understand the basic process, practise with simple subjects.
- Apple or pear: Learn rounded forms, highlights, and shadows.
- Simple landscape: Practise large color areas and atmospheric effects.
- Single flower: Explore curved brushstrokes and color variation.
- Fruit bowl: Work on composition and the relationship between several objects.
- Mountain scene: Practise overlapping shapes and differences in value.
- Simple vase: Explore symmetry, edges, and reflected light.
- Color study: Mix several variations of one color to understand its range.
Choose subjects with clear shapes and manageable details. Repeating the same subject can help you understand how your brushwork and color choices affect the result.
How to Practise Oil Painting at Home
A regular practice routine can help you develop control without requiring long sessions every day.
Try this beginner routine:
- First 5 minutes: Observe your subject and identify the light direction.
- Next 10 minutes: Mix a small selection of useful colors.
- Next 15 minutes: Paint the large shapes and main shadows.
- Final 5 minutes: Review proportions, values, and color relationships.
Treat this as a practice structure, not a requirement to complete or dry an oil painting within 35 minutes. You may need to continue the work in another session.
Keep notes about the colors you mixed, the brushes you used, and the areas you found difficult. Review these notes before your next painting.
Oil Painting vs. Acrylic Painting
Oil and acrylic paints can both produce rich colors and detailed artwork, but they behave differently.
- Oil painting: Often offers a longer working time and makes gradual blending easier, but drying may take much longer.
- Acrylic painting: Generally dries faster and can be convenient for artists who want to build layers without waiting as long between sessions.
The best choice depends on your working style, available space, patience, and material preferences.
If you want to explore acrylic techniques first, read Acrylic Painting for Beginners: A Step-by-Step Guide. You can also read Acrylic vs Oil Painting for a broader comparison.
Final Tips for Oil Painting Beginners
Oil painting becomes more manageable when you start with simple subjects, use a limited color palette, and learn to observe light and shadow.
Focus on the large shapes before adding details. Mix colors carefully, practise controlled brushstrokes, and give the painting enough time to dry safely.
You do not need expensive equipment or advanced drawing skills to begin. A small set of paints, a prepared surface, a few suitable brushes, and a simple subject are enough to start learning.
Be patient with your early paintings. Each attempt will help you understand color, form, texture, and the unique qualities of oil paint.
FAQs
1. Is oil painting suitable for beginners?
Yes. Beginners can learn oil painting by starting with simple subjects, a limited color palette, and basic techniques such as brushwork, layering, blending, and shading.
2. What materials do I need to start oil painting?
You need oil paints, suitable brushes, a properly prepared canvas or painting surface, and a palette. Appropriate cleaning materials and a safe, ventilated workspace are also important.
3. Which oil paints should beginners buy?
A small student-grade or artist-quality set is sufficient. Begin with a limited selection of useful colors rather than buying a large collection immediately.
4. Can I use ordinary paper for oil painting?
Ordinary unprimed paper is generally unsuitable for direct oil painting. Use a properly prepared canvas, canvas panel, or paper specifically designed for oil paint.
5. How long does oil paint take to dry?
Drying time varies by pigment, paint thickness, medium, temperature, and airflow. Some areas may become touch-dry relatively quickly, while others can take much longer. Follow the manufacturer’s guidance.
6. Is oil painting harder than acrylic painting?
Oil painting can require more patience because it often dries slowly and needs careful layer management. Acrylic paint usually dries faster. Neither medium is universally harder; the choice depends on your goals and working style.
7. Can beginners mix oil paint colors?
Yes. Color mixing is an essential beginner skill. Start with small amounts of paint and practise creating lighter, darker, warmer, and cooler variations.
8. Do I need a thinner for oil painting?
Not necessarily. Some artists use painting mediums or solvents for particular effects, but solvent-free approaches are also possible. Follow the instructions for your specific materials.
9. Can I blend oil paints with a brush?
Yes. A suitable clean brush can soften transitions between colors. Use controlled strokes and avoid excessive blending, which can make colors muddy.
10. What is the easiest subject for a first oil painting?
A single fruit, simple vase, basic landscape, or flower is a good starting point because each subject has manageable shapes and a limited number of colors.
11. Do oil paintings need multiple layers?
Not always. Some paintings are created in a single session, while others use several layers. Layering depends on the desired effect and the artist’s process.
12. Can I paint over wet oil paint?
You can sometimes work into wet paint, depending on the technique. However, adding new layers requires an understanding of paint consistency and appropriate layering practices.
13. How should I clean oil paint brushes?
Use a cleaning method suitable for your paint and brush type. Follow product instructions, maintain ventilation when using solvents, and never pour solvent waste down household drains.
14. Is oil painting safe to do at home?
It can be practised at home when materials are handled responsibly. Maintain good ventilation, follow labels, keep materials away from children and flames, and store and dispose of paint-contaminated materials safely.
15. How often should beginners practise oil painting?
Regular practice helps develop brush control, color mixing, and observation skills. Short, focused exercises several times a week can be useful, although individual progress varies.



Leave a Reply