

Learn how to make a volcano model for a school project using cardboard, clay, and simple materials. Follow easy steps and try a safe baking soda eruption.
How to Make a Volcano Model for a School Project
A volcano model is an exciting way to learn about volcanoes, Earth’s structure, and volcanic eruptions. It is a popular school science project because students can build a 3D mountain, create a crater, and demonstrate a simulated eruption using simple household materials.
You do not need expensive supplies to make an attractive volcano model. Cardboard, newspaper, modeling clay, glue, paint, and a small container are enough to create a realistic-looking volcano. If your teacher allows a demonstration, you can also use baking soda and vinegar to produce a small, foamy eruption.
In this guide, you will learn how to make a volcano model for a school project step by step, how to create a simple working demonstration, how to label the main parts, and how to explain the science behind the model.
What Is a Volcano?
A volcano is an opening in Earth’s crust through which molten rock, gases, and other materials can reach the surface. When molten rock is beneath Earth’s surface, it is called magma. When it reaches the surface, it is called lava.
Volcanoes can form different landforms, including cone-shaped mountains. During an eruption, a volcano may release lava, ash, rock fragments, and gases. Not every volcano erupts in the same way, and some volcanoes remain inactive for long periods.
A school volcano model represents the general shape of a volcano and may illustrate how material emerges from a central opening.
Materials Required to Make a Volcano Model
Gather these materials before starting your project.
For the 3D Volcano Model
- A sturdy cardboard sheet or a shallow cardboard tray
- An empty, small plastic cup or bottle with a wide opening
- Old newspaper or scrap paper
- Masking tape
- Modeling clay, papier-mâché, or air-dry clay
- Brown, black, grey, and green paint or colored paper
- Red and orange paint or paper for lava decoration
- Paintbrushes
- Glue
- Pencil and marker
- Small paper labels
- Scissors
Additional Materials for a Simple Eruption Demonstration
- 1–2 teaspoons of baking soda
- A small amount of vinegar
- A few drops of dishwashing liquid (optional)
- Red or orange food coloring (optional)
- A small tray to catch the foam
Safety note: Ask an adult to supervise the demonstration. Use only a small quantity of the ingredients in an open container. Never seal the container during the reaction, as gas pressure can build up. Do not use fire, strong chemicals, or a glass container for the demonstration. Keep the mixture away from eyes and do not taste it.
How to Make a Volcano Model Step by Step
Step 1: Prepare the Base
Take a sturdy piece of cardboard and place it on a flat work surface. A square or rectangular base works well.
If you are using a cardboard box, cut a flat section from it. Make sure the base is wide enough to support the volcano without tipping over.
Cover the base with brown or green paper if you want to create a landscape. You can add small paper trees, rocks, or a river later.
Step 2: Place the Volcano Opening
Take a small, empty plastic cup or bottle with a wide opening. Place it upright near the center of the cardboard base.
This opening will represent the crater or vent area of the model. Secure the container to the base with masking tape.
Choose a container that can stand steadily. If you plan to demonstrate the baking soda and vinegar reaction, use an open container that is easy to clean.
Step 3: Build the Volcano Shape
Crumple old newspaper into several balls and arrange them around the container. Use masking tape to hold the paper in place and create a rough, sloping mountain shape.
Leave the top opening uncovered. Make the sides slope upward toward the crater, giving the structure a cone-like appearance.
Check the model from different angles. Add or remove paper until the mountain looks balanced and stable.
Alternative: You can use modeling clay or air-dry clay to build the entire volcano shape around the container. Avoid covering or blocking the opening.
Step 4: Cover the Structure
Cover the newspaper framework with strips of masking tape to make the surface more stable.
If you are using papier-mâché, apply thin strips of paper dipped in a simple flour-and-water paste. Allow each layer to dry before adding another.
You can also cover the framework with modeling clay. Smooth the surface with your fingers or a blunt craft tool.
Keep the crater opening clear and make sure the model is firmly attached to its base.
Step 5: Let the Model Dry
If you used papier-mâché, glue, or air-dry clay, leave the model to dry according to the material instructions.
A completely dry surface is easier to paint and decorate. Rushing this step may cause the structure to bend, crack, or become unstable.
Place the model in a well-ventilated area and keep it away from open flames or heat sources.
Step 6: Paint the Volcano
Use brown, dark grey, or black paint to color the mountain. Add lighter grey or tan shades to create the appearance of rocky surfaces.
Paint the base green or brown to represent land. You can add small patches of green paper to represent grass and vegetation.
Use red and orange paint to create decorative lava trails flowing down the sides of the volcano. These painted trails are only visual representations; they are not actual lava.
Allow the paint to dry completely before continuing.
Step 7: Create the Crater
Look at the opening at the top of your volcano. This is the crater area shown in your model.
Darken the rim with brown or grey paint. You can add a little red or orange color inside the opening to represent hot material beneath the surface.
Do not permanently cover the opening if you want to perform the optional baking soda demonstration.
Step 8: Add Lava Trails and Landscape Details
Use red and orange paper, paint, or modeling clay to create lava trails flowing down the mountain.
You can also add small rocks made from paper or clay around the base. A few trees, shrubs, or hills can make the scene more attractive.
Keep the decorations simple so that the volcano remains the main focus of the project.
Step 9: Label the Main Parts
Prepare small labels and attach them to the appropriate parts of your model.
Useful labels include:
- Crater: The bowl-shaped depression or opening near the top of the volcano.
- Main Vent: The main passage through which magma may rise toward the surface.
- Magma Chamber: An underground region where magma may accumulate.
- Lava Flow: Molten rock that has reached Earth’s surface.
- Volcanic Cone: The raised landform built from erupted material over time.
A basic exterior model may not show underground structures clearly. You can add a cutaway illustration on one side of the base to show the magma chamber and main vent beneath the surface.
Step 10: Add a Project Title
Write the title “VOLCANO MODEL” on a small card and attach it to the front of the base.
You can add a subtitle such as “A School Science Project on Volcanic Eruptions.”
Write your name, class, and subject on a separate information card if your teacher requires them.
Step 11: Check the Finished Model
Before taking the model to school, check that:
- The base is stable.
- The crater opening is clear.
- All labels are readable.
- The paint and glue have dried.
- Loose parts are securely attached.
- The model can be carried without breaking.
Your 3D volcano model is now ready for display. If you want to demonstrate a simulated eruption, follow the optional activity below.
How to Make a Working Volcano Model
A baking soda and vinegar demonstration creates foam that rises from the crater. This is a simple way to make a volcano model appear to erupt.
It is important to understand that this is a chemical demonstration, not a real volcanic eruption. Natural volcanic eruptions involve magma, gases, pressure, and geological processes that are much more complex.
Materials
- Your completed volcano model with an open crater
- A small, open plastic cup fitted inside the crater
- 1–2 teaspoons of baking soda
- A small amount of vinegar
- A few drops of dishwashing liquid (optional)
- A few drops of red or orange food coloring (optional)
- A tray to catch the foam
Steps
- Place the volcano on a level, washable surface. Put a tray underneath it to catch spills.
- Make sure the small cup inside the crater is open and stable.
- Add 1–2 teaspoons of baking soda to the cup.
- Add a few drops of food coloring and a small amount of dishwashing liquid if desired.
- Slowly pour in a little vinegar.
- Watch as bubbles and foam rise through the opening and spill down the sides.
- After the demonstration, clean the model and work surface.
Use only small quantities and do not lean over the crater. Keep the reaction container open at all times. Never add bleach, drain cleaner, or other cleaning chemicals. Adult supervision is recommended.
Why Does the Volcano Foam?
Baking soda and vinegar react to produce carbon dioxide gas. The gas forms bubbles, and the dishwashing liquid helps trap those bubbles, producing foam.
The foam rising from the cup creates the appearance of an eruption. However, this reaction does not reproduce the heat, molten rock, or geological forces involved in a real volcanic eruption.
How Does a Real Volcano Erupt?
Inside Earth, rock can melt under suitable conditions and form magma. Magma may contain dissolved gases. When magma moves toward the surface, changes in pressure can allow gases to expand and form bubbles.
Depending on the magma, gas content, and other conditions, a volcanic eruption may produce flowing lava, ash, rock fragments, and gases. Some eruptions are relatively gentle, while others are explosive.
Your school model illustrates the general shape and opening of a volcano. The baking soda demonstration shows a gas-producing reaction, but it should not be used as a literal explanation of how magma erupts.
Main Parts of a Volcano
| Part | Description |
|---|---|
| Magma chamber | An underground region where magma may accumulate |
| Main vent | A passage through which magma rises toward the surface |
| Crater | A depression or opening near the summit of many volcanoes |
| Volcanic cone | A landform built from erupted lava, ash, and other material |
| Lava flow | Molten rock moving across Earth’s surface after an eruption |
| Side vent | A secondary passage through which volcanic material may emerge |
Not every volcano has exactly the same structure. These labels show common features that are useful for a basic school project.
How to Make Your Volcano Project Attractive
Follow these tips to create a neat and informative display.
- Create a strong shape: Make the mountain broad at the base and narrower toward the top.
- Use contrasting colors: Brown and grey work well for the mountain, while red and orange can represent lava.
- Keep the crater visible: Do not cover the opening with decorations.
- Add a cutaway diagram: Show the magma chamber and main vent inside the volcano.
- Use clear labels: Place labels near the relevant parts without covering the model.
- Keep the base tidy: Add a small amount of landscape decoration without overcrowding the display.
- Make it sturdy: Reinforce the cardboard base and secure the structure properly.
- Explain the science accurately: Distinguish the baking soda reaction from a real volcanic eruption.
Short Explanation for a School Science Exhibition
You can use this short presentation when explaining your volcano model to your teacher or classmates.
“Good morning, everyone. My project is a model of a volcano.
A volcano is an opening in Earth’s crust through which magma, gases, and other materials can reach the surface. Magma is called lava when it comes out onto Earth’s surface.
My model shows the volcanic cone, crater, main vent, and magma chamber. During a real eruption, volcanic material may emerge through vents and spread over the surrounding area.
I can also demonstrate a small baking soda and vinegar reaction. It produces carbon dioxide gas and foam that rises from the crater. This is a safe, small-scale classroom demonstration when performed with adult supervision, but it is not the same as a real volcanic eruption.
This project helps us understand volcano structure and learn about Earth’s geological processes. Thank you.”
Learning Benefits of a Volcano Model
Making a volcano model helps students:
- Learn about volcanoes and Earth’s structure.
- Understand basic geological terms.
- Connect diagrams with a three-dimensional model.
- Develop creativity and practical craft skills.
- Practice planning, measuring, and assembling materials.
- Improve confidence when presenting a science project.
- Learn to distinguish a classroom demonstration from a natural geological process.
Common Mistakes to Avoid
1. Blocking the crater: Keep the opening clear if you want to demonstrate the foam reaction.
2. Making the base unstable: A broad, sturdy base helps prevent the model from tipping over.
3. Using too much decoration: Avoid covering the labels or hiding the volcano’s shape.
4. Mislabeling magma and lava: Magma is molten rock beneath the surface; lava is molten rock that has reached the surface.
5. Calling the baking soda reaction a real eruption: Explain that it is a chemical demonstration that produces foam.
6. Sealing the reaction container: Never close the container during the demonstration because gas pressure can build up.
7. Carrying a wet model: Let the glue, clay, and paint dry completely before transporting the project.
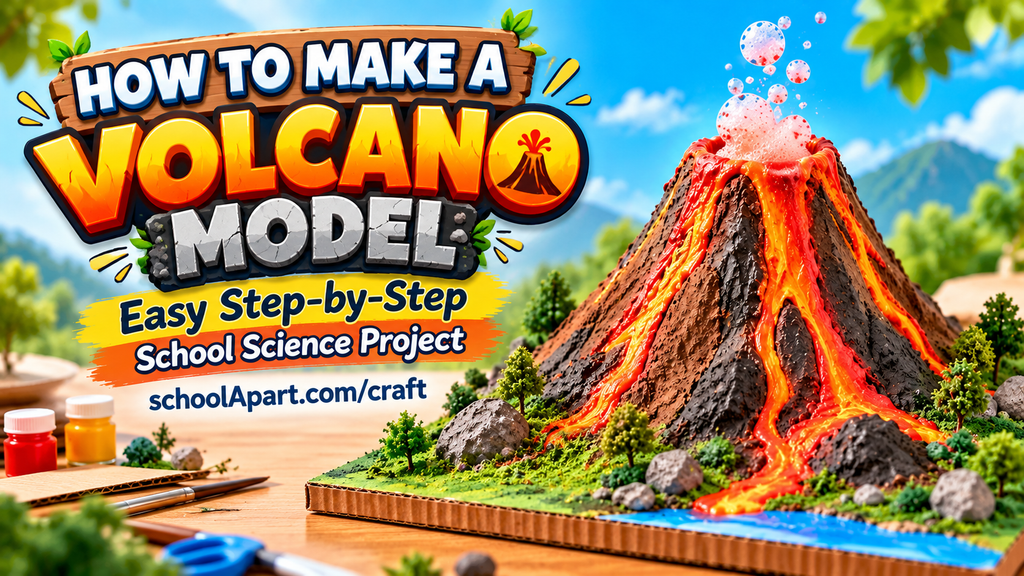
A volcano model is a creative and educational school science project that can be made using cardboard, newspaper, clay, paint, and a few simple craft materials. By building the volcanic cone, leaving a clear crater, and adding labels, students can create a useful 3D display of a volcano’s main features.
For an optional demonstration, a small baking soda and vinegar reaction can produce foam that rises from the crater. Always explain that this reaction is different from a natural volcanic eruption.
The best school project is one that is neat, stable, scientifically accurate, and easy to explain. With careful construction and clear labels, your volcano model can become an engaging addition to a classroom assignment or science exhibition.
Frequently Asked Questions (FAQ)
1. How do you make a volcano model for a school project?
Use cardboard as a base, place a small open container in the center, and build a mountain shape around it using newspaper, tape, clay, or papier-mâché. Paint it, add labels, and leave the crater open.
2. What materials are needed to make a volcano model?
Common materials include cardboard, newspaper, masking tape, glue, modeling clay, paint, a small plastic cup, and paper labels. Baking soda and vinegar are optional for a foam demonstration.
3. How do you make a 3D volcano model?
Build a raised cone around a small container using crumpled newspaper and tape, then cover it with clay or papier-mâché. Paint the surface and add a crater, lava trails, and labels.
4. How can I make a working volcano model?
Place a small open cup inside the crater. Add a little baking soda and, if desired, food coloring and dishwashing liquid. Slowly add a small amount of vinegar to produce foam. An adult should supervise the activity.
5. What causes the baking soda volcano to erupt?
Baking soda reacts with vinegar and releases carbon dioxide gas. The gas creates bubbles, while dishwashing liquid can help produce foam that rises out of the container.
6. Is a baking soda volcano a real volcanic eruption?
No. It is a small chemical demonstration. Real volcanic eruptions involve magma, gases, pressure changes, and geological processes.
7. What is the difference between magma and lava?
Magma is molten rock beneath Earth’s surface. When molten rock reaches the surface, it is called lava.
8. What is the crater of a volcano?
A crater is a depression or opening near the summit of many volcanoes. It may surround the main vent.
9. What is the magma chamber?
A magma chamber is an underground region where magma may accumulate. Its size, shape, and behavior vary between volcanic systems.
10. How can I make a volcano model without clay?
Use crumpled newspaper, masking tape, cardboard, and papier-mâché to form the mountain. Once dry, paint the surface to create a realistic appearance.
11. Can I make a volcano model using recycled materials?
Yes. Reuse cardboard boxes, old newspaper, scrap paper, and suitable packaging materials. Clean materials before use and choose a stable base.
12. How long does it take to make a volcano model?
A simple model may take one to three hours of active work. Papier-mâché, glue, and paint may require additional drying time, sometimes extending the project over a day or more.
13. Which colors should I use for a volcano model?
Brown, grey, and black are useful for the volcanic cone. Red and orange can represent lava, while green and brown work well for the surrounding landscape.
14. How can I show lava flowing down a volcano?
Use red and orange paint, colored paper, or modeling clay to create trails running down the sides of the cone. These are visual representations of lava flows.
15. What labels should I add to a volcano model?
Useful labels include crater, main vent, magma chamber, volcanic cone, lava flow, and side vent. Add a cutaway illustration if you want to show underground features.
16. What is the main purpose of a volcano model?
It helps students understand the basic structure of a volcano, learn geological vocabulary, and present scientific information through a three-dimensional display.
17. Can younger students make a volcano model?
Yes. Younger students can build a simple model using cardboard, paper, and child-safe glue. Adult assistance is recommended for cutting materials and conducting any demonstration.
18. How do I make my volcano model stand out in a science exhibition?
Use a sturdy base, realistic surface colors, clear labels, and a cutaway view of the internal structure. Keep the display neat and prepare a short, accurate explanation.
19. Is vinegar safe to use in a school volcano project?
Small amounts of ordinary household vinegar can be used for a supervised classroom demonstration. Avoid contact with eyes, never mix it with cleaning chemicals, and keep the reaction container open.
20. Can I make a volcano model without a chemical reaction?
Yes. A static model made from cardboard, paper, clay, and paint is sufficient for many school assignments. Use painted lava trails to illustrate an eruption without performing a reaction.






Leave a Reply