

Learn how to sketch simple objects step by step. Discover basic shapes, proportions, shading, easy objects to sketch, beginner exercises, and practical tips.
How to Sketch Simple Objects Step by Step: A Beginner’s Guide
Learning how to sketch simple objects is one of the best ways to improve your drawing skills. Before trying to draw complicated portraits, landscapes, or detailed illustrations, beginners can build confidence by practicing with everyday objects such as a cup, bottle, book, apple, box, spoon, or vase.
Simple object sketching teaches you how to observe shapes, proportions, lines, light, shadow, and three-dimensional form. It also helps you understand how real objects can be simplified into basic shapes.
The good news is that you do not need expensive art supplies to get started. A pencil, eraser, paper, and a few everyday objects are enough.
In this guide, you will learn how to sketch simple objects step by step, how to break objects into basic shapes, how to add details and shading, common beginner mistakes, and practical exercises to improve your observation and sketching skills.
What Is Object Sketching?
Object sketching is the process of drawing an object by carefully observing its shape, size, structure, position, and details.
Instead of drawing from memory, object sketching usually involves looking at a real object or a reference image and translating what you see onto paper.
Sketching for Beginners: A Complete Guide to Getting Started
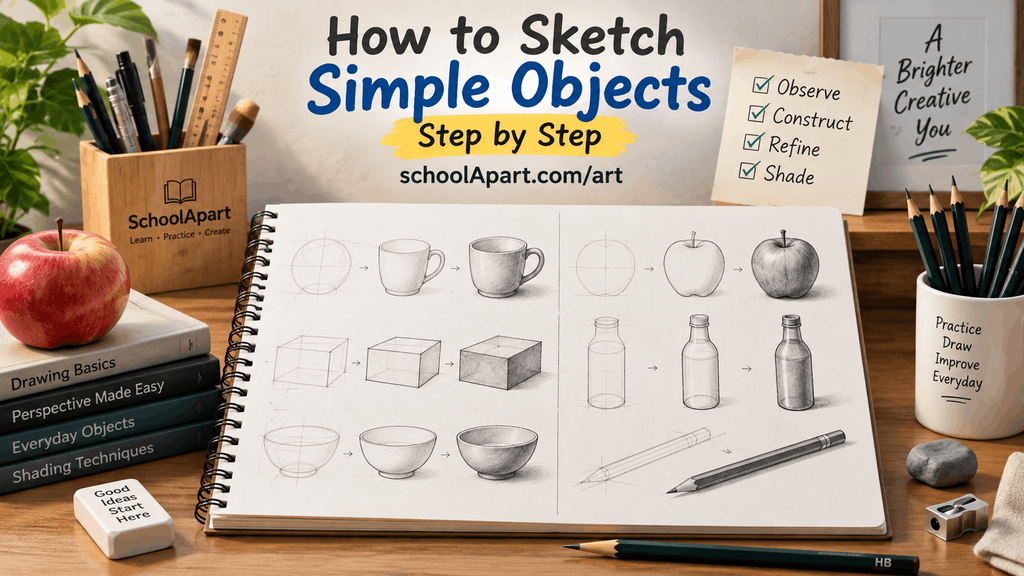
For example, a simple cup can be understood through:
- An oval for the opening
- Two curved lines for the sides
- Another curved line for the bottom
- A handle made from curved shapes
- Light and shadow to create depth
This approach makes complicated-looking objects easier to draw.
Object sketching is particularly useful for beginners because it develops observation skills and drawing accuracy at the same time.
Why Should Beginners Practice Simple Objects?
Drawing simple objects may seem easy, but it teaches many important artistic skills.
1. It Improves Observation
Good drawing begins with good observation.
When you sketch an object, you learn to notice:
- Its overall shape
- Width and height
- Curves and angles
- Position of different parts
- Light direction
- Shadows
- Small details
With regular practice, you become better at seeing what is actually in front of you rather than drawing what you think an object looks like.
2. It Builds Confidence
Starting with complicated subjects can be frustrating.
Simple objects allow beginners to complete drawings more quickly. Finishing small sketches gives you confidence to move toward more challenging subjects.
3. It Teaches Proportion
Proportion means the relationship between the sizes of different parts.
For example, when drawing a bottle, you need to consider:
- How tall it is compared with its width
- How large the neck is
- Where the shoulders begin
- How wide the bottom is
Practicing everyday objects helps you understand these relationships naturally.
4. It Develops Shading Skills
Objects provide excellent opportunities to practice light and shadow.
A simple sphere can teach you how light gradually changes across a curved surface, while a box can help you understand clear differences between light and dark surfaces.
5. It Prepares You for More Advanced Drawing
The skills learned from object sketching can later be applied to:
- Still life drawing
- Nature drawing
- Character drawing
- Portrait drawing
- Interior drawing
- Product illustration
- Architectural sketches
What You Need to Sketch Simple Objects
You do not need a large collection of art supplies.
For basic object sketching, start with:
Essential Supplies
- Drawing paper or a sketchbook
- HB pencil
- 2B pencil
- Eraser
- Pencil sharpener
Optional Supplies
As you become more comfortable, you can experiment with:
- 4B or 6B pencil
- Blending stump
- Kneaded eraser
- Ruler
- Fine-line pen
For beginners, however, a simple HB or 2B pencil is enough.
Start by Understanding Basic Shapes
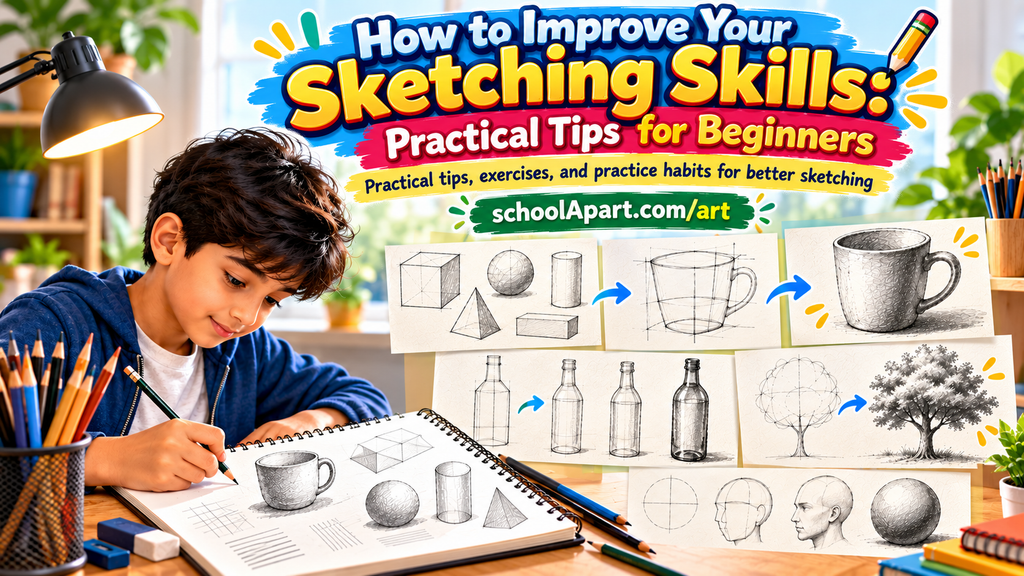
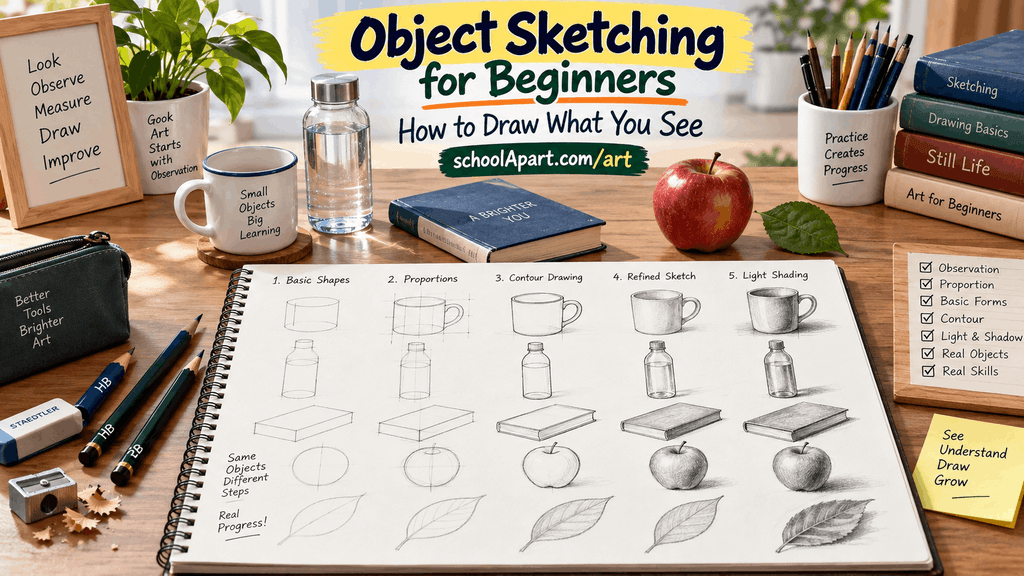
One of the easiest ways to sketch an object is to simplify it into basic geometric forms.
Many everyday objects can be constructed from:
- Circle
- Oval
- Square
- Rectangle
- Triangle
- Cube
- Cylinder
- Sphere
- Cone
For example:
| Object | Basic Shapes You Can Look For |
|---|---|
| Book | Rectangle |
| Box | Cube or rectangular prism |
| Cup | Cylinder |
| Bottle | Cylinders + curved forms |
| Apple | Circle or sphere |
| Orange | Sphere |
| Ice cream cone | Cone + sphere |
| Vase | Cylindrical and curved forms |
| Pencil | Long cylinder |
| Bowl | Oval + curved form |
This does not mean your final drawing should look geometric. The shapes are simply construction guides that help you understand the object’s structure.
How to Sketch Simple Objects Step by Step
Now let’s go through a simple process that you can use for almost any everyday object.
Step 1: Choose a Simple Object
Start with something that has a relatively simple structure.
Good beginner objects include:
- Cup
- Book
- Bottle
- Apple
- Spoon
- Pencil
- Box
- Bowl
- Mug
- Vase
Avoid highly detailed objects when you are just starting.
Place the object in front of you where you can clearly see it.
Step 2: Observe Before Drawing
Do not immediately start drawing.
Spend a few moments looking carefully at the object.
Ask yourself:
- What is the overall shape?
- Is it taller than it is wide?
- Where is its widest point?
- Where is its narrowest point?
- Are the sides straight or curved?
- Which parts are symmetrical?
- Where is the light coming from?
- Where is the darkest shadow?
This short observation stage can make a significant difference.
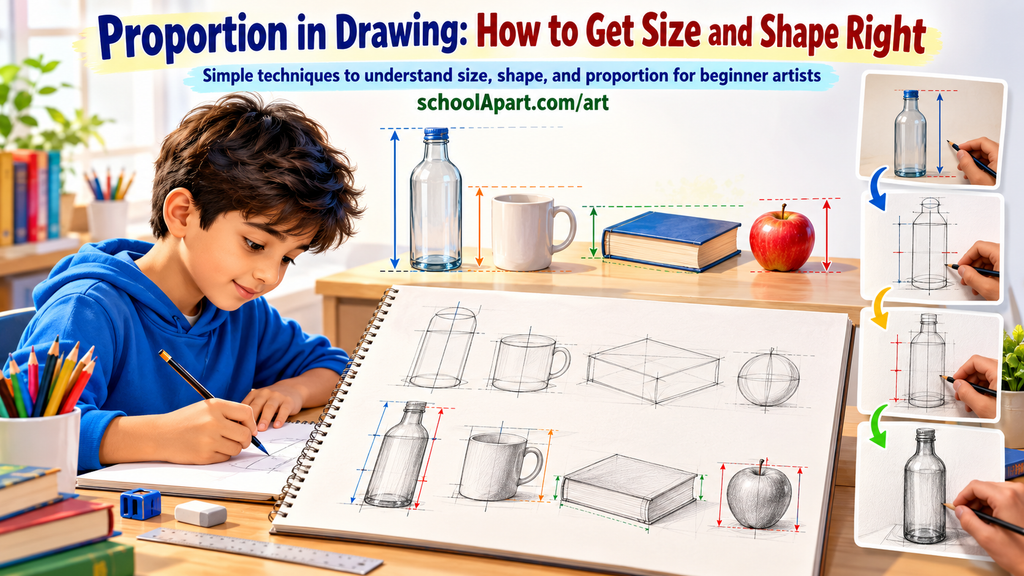
Step 3: Find the Overall Height and Width
Before drawing details, estimate the object’s overall proportions.
Imagine an invisible rectangle around the object.
Determine:
Height: How tall is the object?
Width: How wide is the object?
You can lightly mark these boundaries on your paper.
For example, if a bottle is approximately twice as tall as it is wide, keep that relationship in your sketch.
Do not worry about making everything perfect immediately.
Step 4: Identify the Basic Shapes
Now look for the simple forms inside the object.
Suppose you are drawing a mug.
You might identify:
- Oval → opening
- Cylinder → main body
- Curved form → handle
If you are drawing a book:
- Rectangle → front surface
- Smaller rectangles → pages
- Lines → edges
If you are drawing an apple:
- Sphere-like form → main body
- Small cylinder or curved form → stem
This step gives your drawing a clear structure.
Step 5: Lightly Draw the Construction Lines
Use a light pencil pressure.
Draw the basic shapes without worrying about details.
At this stage, your drawing may look very simple.
That is completely normal.
The purpose of construction lines is to help you check:
- Size
- Shape
- Position
- Proportion
- Alignment
Avoid pressing hard because you may need to erase or adjust these lines later.
Step 6: Refine the Outer Contour
Once the basic structure looks correct, begin refining the object’s outer edges.
The contour is the visible outline or boundary of the object.
Pay attention to:
- Curves
- Corners
- Changes in direction
- Uneven edges
- Symmetry
Try not to use many short, scratchy lines.
Instead, whenever possible, use controlled strokes that follow the form.
Step 7: Add Important Details
Now add the details that make the object recognizable.
For example:
Cup
Add:
- Rim
- Handle
- Inner opening
- Bottom edge
Book
Add:
- Cover
- Pages
- Spine
- Page edges
Bottle
Add:
- Neck
- Cap
- Shoulder
- Label
Spoon
Add:
- Bowl
- Neck
- Handle
Do not add every tiny detail.
Focus first on the details that are visually important.
Step 8: Check the Proportions
Before shading, stop and compare your drawing with the object.
Look for differences.
Ask:
- Is the object too tall?
- Is it too wide?
- Is the top too large?
- Are the curves correct?
- Is one side noticeably different?
- Are the individual parts positioned correctly?
This is a good time to make corrections.
Correcting the structure before adding shading is much easier than correcting it later.
Step 9: Identify the Light Source
Before adding shadows, determine where the light is coming from.
For example:
Light from the upper left → darker areas generally appear toward the lower right.
Look at the real object and identify:
- Highlight
- Light area
- Midtone
- Core shadow
- Cast shadow
You do not need to reproduce every subtle change when you are starting.
Focus on the major light and dark areas first.
Step 10: Add Basic Shading
Now introduce light and dark values.
Start lightly.
You can gradually build darker areas by adding more layers of pencil strokes.
Common shading techniques include:
- Hatching
- Cross-hatching
- Layered strokes
- Circular shading
- Blending
For beginners, controlled pencil layering is often a good place to start.
Remember:
Do not make everything equally dark.
A drawing becomes more three-dimensional when there is a clear difference between light, middle, and dark areas.
Step 11: Add the Cast Shadow
The cast shadow is the shadow created when an object blocks light from reaching the surface beneath it.
It is an important part of object sketching because it helps the object feel grounded.
Observe:
- Which direction the shadow moves
- How dark it is near the object
- How it becomes softer farther away
- What shape the shadow creates
A simple object with a believable cast shadow can look much more realistic.
Step 12: Clean Up the Drawing
Once your sketch is complete:
- Erase unnecessary construction lines
- Remove accidental marks
- Strengthen important contours
- Adjust dark areas
- Add final highlights if needed
Do not erase everything.
Some construction marks may be useful during the drawing process, but the final sketch should have a clear visual structure.
Easy Objects to Sketch for Beginners
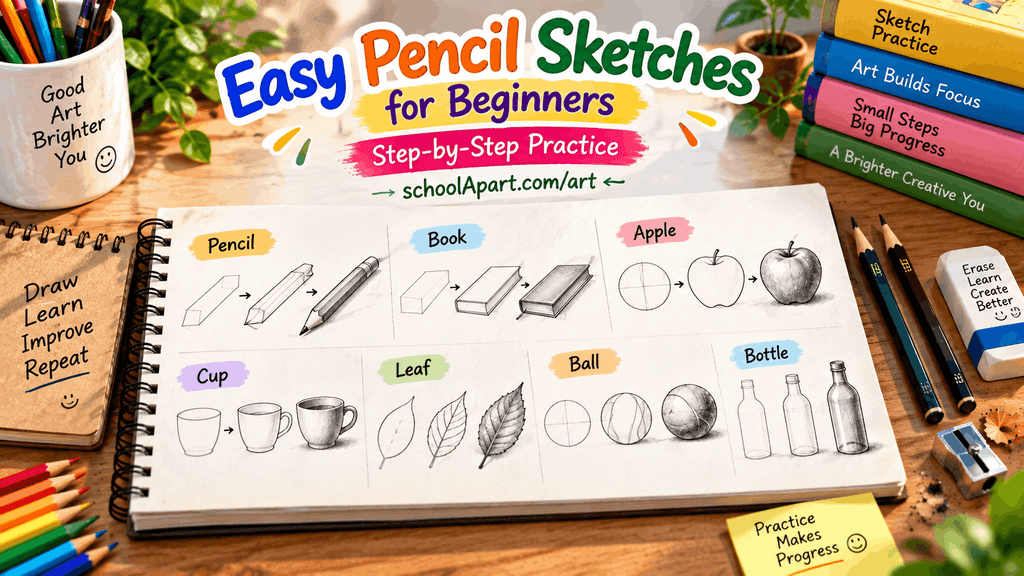
If you are new to object sketching, practice with objects that contain simple forms.
1. Pencil
A pencil is an excellent first exercise.
Start with:
- Long rectangular or cylindrical body
- Pointed tip
- Eraser
- Small details
This teaches straight lines and simple perspective.
2. Book
A book helps you practice:
- Rectangles
- Parallel lines
- Perspective
- Edges
- Basic shading
Start with a closed book rather than an open book.
3. Cup
A cup is useful for practicing:
- Ovals
- Curves
- Cylindrical forms
- Interior surfaces
- Shadows
Pay special attention to the opening of the cup.
4. Apple
An apple is a great introduction to organic forms.
Instead of drawing a perfect circle, observe:
- Indentations
- Curves
- Uneven surface
- Stem
- Highlight
- Cast shadow
This teaches you that natural objects are rarely perfect geometric shapes.
5. Bottle
A bottle is useful for practicing symmetry and proportion.
Look at:
- Neck
- Shoulder
- Body
- Base
- Cap
You can lightly draw a vertical centerline to help maintain symmetry.
6. Bowl
A bowl provides excellent practice for:
- Ellipses
- Curved surfaces
- Interior space
- Light and shadow
Start with the top ellipse and then build the sides downward.
7. Box
A box is useful for understanding three-dimensional forms.
It helps you practice:
- Straight lines
- Corners
- Perspective
- Multiple surfaces
- Light and shadow
How to Sketch a Simple Cup
Let’s use a cup as a practical example.
Step 1
Draw a light oval for the opening.
Step 2
Add two lightly curved or slightly vertical lines downward from the sides of the oval.
Step 3
Connect the lower section with a curved line.
Step 4
Add the handle using two curved lines.
Step 5
Refine the rim and outer contour.
Step 6
Identify the light source.
Step 7
Add shading to the darker side.
Step 8
Draw the cast shadow beneath the cup.
Step 9
Erase unnecessary construction lines.
The result does not need to be photorealistic. The goal is to understand the object’s structure.
How to Sketch a Simple Box
A box is another excellent beginner exercise.
Step 1
Draw the front face as a rectangle.
Step 2
Add the side and top planes using simple perspective lines.
Step 3
Check that the edges create a believable three-dimensional form.
Step 4
Choose the light direction.
Step 5
Make the brightest surface lighter and the darker surfaces deeper.
Step 6
Add a cast shadow beneath the box.
This exercise can help you understand how flat shapes become three-dimensional objects.
How to Sketch a Simple Apple
An apple looks simple but provides excellent practice.
Step 1
Begin with a light circle-like shape.
Step 2
Modify the outline to create the apple’s natural curves.
Step 3
Add the small indentation at the top.
Step 4
Draw the stem.
Step 5
Observe the highlight and shadow.
Step 6
Gradually build the darker side.
Step 7
Add a soft cast shadow.
Avoid making the apple a mathematically perfect circle.
How to Use Basic Shapes When Sketching Objects
Basic shapes are not only useful for children’s drawings. They are also important construction tools for developing drawing skills.
When looking at an object, try asking:
“What simple forms make up this object?”
For example:
Bottle → cylinders + curved forms
Mug → cylinder + curved handle
Camera → rectangular body + circles
Toy car → rectangular body + cylinders/circles
Lamp → cylinder + cone + sphere-like forms
This way of thinking can make unfamiliar objects much easier to sketch.
How to Sketch Objects from Different Angles
An object can look completely different depending on your viewpoint.
For example, a cup viewed from:
- Straight ahead
- Slightly above
- From the side
- From a higher angle
will have different visible surfaces.
When practicing, draw the same object from several viewpoints.
This teaches you to understand the object’s three-dimensional structure instead of memorizing a single outline.
Object Sketching Practice Exercises
Regular practice is more useful than drawing one complicated picture occasionally.
Try these exercises.
Exercise 1: One Object, Five Minutes
Choose one simple object.
Set a five-minute limit.
Focus only on:
- Shape
- Proportion
- Basic contour
Do not worry about detailed shading.
Exercise 2: Same Object, Three Angles
Choose a cup, bottle, or box.
Draw it from three different viewpoints.
This helps improve spatial understanding.
Exercise 3: Shape Breakdown
Choose an object and identify its basic forms before drawing.
For example:
Mug → cylinder + oval + curved handle
Then build the sketch from those forms.
Exercise 4: Light and Shadow
Choose one object and place a lamp or light source on one side.
Draw:
- Highlight
- Midtone
- Shadow
- Cast shadow
This is excellent shading practice.
Exercise 5: Blind Observation
Spend one minute looking at the object before touching your pencil.
Try to remember:
- Overall proportions
- Major curves
- Position of parts
- Light direction
Then begin drawing.
This exercise strengthens observation.
A Simple 7-Day Object Sketching Practice Plan
If you want a structured routine, try this beginner-friendly seven-day plan.
Day 1 — Pencil and Book
Practice straight lines, rectangles, and simple proportions.
Day 2 — Cup
Practice ovals, curves, and cylindrical forms.
Day 3 — Apple or Orange
Practice organic shapes and gradual shading.
Day 4 — Bottle
Practice symmetry and proportion.
Day 5 — Box
Practice three-dimensional forms and perspective.
Day 6 — Spoon or Simple Household Object
Practice curved contours and observation.
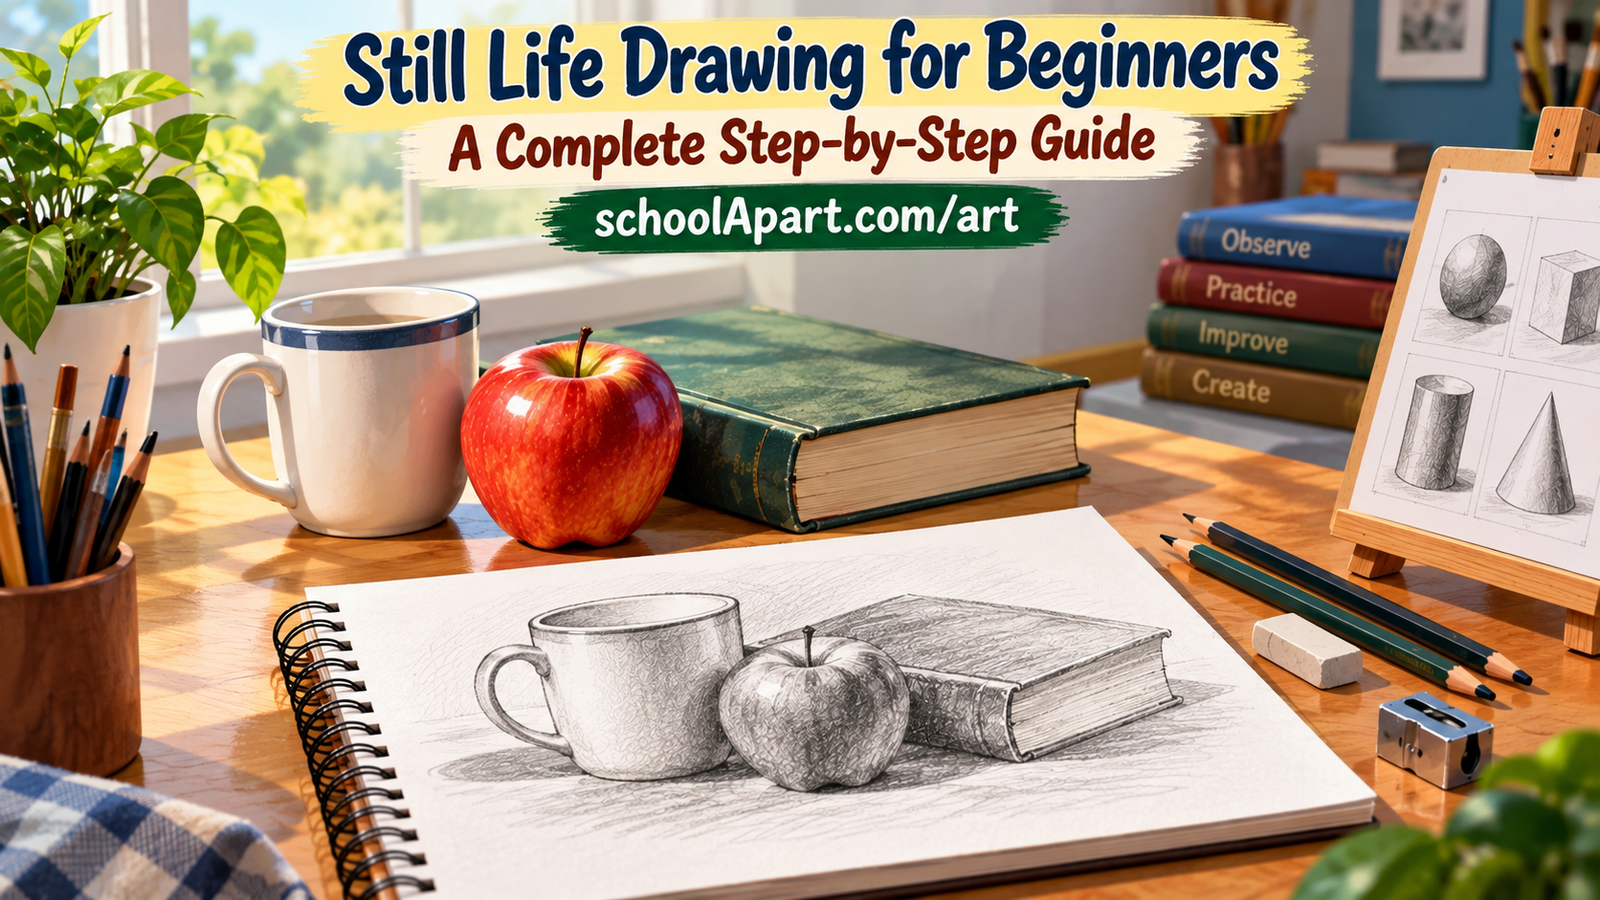
Day 7 — Still Life
Arrange three simple objects and sketch them together.
Keep the drawings simple. The goal is not to create a masterpiece in seven days.
The goal is to build a consistent sketching habit.
Common Mistakes Beginners Make When Sketching Objects
Drawing Details Too Early
Many beginners immediately draw buttons, labels, handles, or tiny patterns.
But if the overall shape is wrong, details will not fix the drawing.
Better approach: Start with the largest forms.
Pressing Too Hard
Heavy construction lines are difficult to correct.
Better approach: Begin with light pencil strokes.
Ignoring Proportion
A bottle may have the correct details but still look wrong if its height-to-width relationship is inaccurate.
Better approach: Compare major measurements before refining.
Drawing From Memory
Memory often replaces observation with a simplified version of the object.
Better approach: Keep the real object or reference image in front of you.
Making Everything the Same Darkness
Without tonal variation, objects can look flat.
Better approach: Look for light, middle, and dark values.
Using Too Much Blending
Over-blending can make a sketch look muddy and remove useful pencil texture.
Better approach: Build values gradually and blend only when appropriate.
Expecting Perfect Results Immediately
Your first object sketches may look rough.
That is normal.
Drawing improves through repeated observation and practice.
Tips to Improve Your Object Sketching
Observe More Than You Draw
Spend time looking before making marks.
Start Large
Draw the overall form before small details.
Use Light Construction Lines
They make corrections easier.
Compare Proportions
Regularly compare height, width, and the size of individual parts.
Practice From Real Objects
Real objects provide valuable observation practice.
Draw the Same Object Repeatedly
Your second or third attempt can reveal improvements that are difficult to notice otherwise.
Practice Light and Shadow Separately
You do not need to fully shade every sketch.
Sometimes a simple light-and-dark study is enough.
Keep Your Sketchbook Nearby
Short, regular sessions can be more effective than occasional long drawing sessions.
From Simple Objects to More Advanced Sketching
Once you become comfortable with simple objects, gradually increase the difficulty.
A useful progression is:
Basic shapes → Single objects → Objects from different angles → Objects with details → Multiple objects → Still life → Complex subjects
For example:
Circle → Apple → Bottle → Vase → Three-object still life
This gradual progression helps you develop skills without becoming overwhelmed.
Simple Object Sketching vs Still Life Drawing
These two concepts are closely related but are not exactly the same.
Object sketching usually focuses on understanding and drawing an individual object.
Still life drawing generally involves arranging multiple objects together and drawing their relationships.
For example:
- One cup → Object sketch
- Cup + book → Simple still life
- Cup + book + fruit + vase → More developed still life
Learning individual objects first makes still life drawing easier later.
Can You Learn Object Sketching Without Artistic Talent?
Yes.
You do not need to be naturally talented to start sketching objects.
Drawing is a skill that develops through:
- Observation
- Practice
- Understanding shapes
- Proportion
- Perspective
- Light and shadow
- Repetition
Some people may progress faster in certain areas, but consistent practice can significantly improve drawing ability.
How Long Should You Practice Object Sketching?
Beginners do not necessarily need long sessions.
You can start with:
10–20 minutes per day.
For example:
- 5 minutes observation and construction
- 5 minutes contour refinement
- 5 minutes shading
- 5 minutes corrections
As your skill improves, you can increase the duration.
The most important factor is consistency.
What Should You Sketch After Simple Objects?
Once you are comfortable drawing individual objects, try:
- Objects from different angles
- Objects with more complex shapes
- Groups of two or three objects
- Simple still life arrangements
- Everyday objects with textures
- Objects under different lighting
- More detailed pencil sketches
This progression helps connect beginner exercises with more advanced drawing practice.
Key Takeaways
Learning how to sketch simple objects is one of the most practical ways for beginners to improve their drawing skills.
Remember these key principles:
- Start with simple objects.
- Observe before drawing.
- Break objects into basic shapes.
- Establish height and width first.
- Use light construction lines.
- Refine the contour gradually.
- Check proportions before adding details.
- Identify the light source.
- Build shading slowly.
- Add a believable cast shadow.
- Practice regularly.
- Draw the same object from different angles.
- Progress from individual objects to simple still life compositions.
You do not need perfect drawings to make progress. Every sketch gives you another opportunity to understand shape, proportion, form, and observation.
With regular practice, even ordinary objects around you can become excellent drawing exercises.
FAQ
1. What are the easiest objects to sketch for beginners?
Some of the easiest objects to sketch are books, pencils, cups, apples, bottles, boxes, bowls, and spoons. These objects have relatively simple shapes and are useful for practicing observation and proportion.
2. How do I start sketching an object?
Start by observing the object carefully. Identify its overall height and width, break it into basic shapes, lightly draw the construction lines, refine the contour, add details, and then work on light and shadow.
3. What should I sketch first as a beginner?
Start with simple everyday objects such as a book, cup, pencil, apple, bottle, or box. These objects allow you to practice basic shapes, proportion, contour, and shading without becoming overwhelmed.
4. Can I sketch objects using basic shapes?
Yes. Many everyday objects can be simplified into circles, ovals, rectangles, cylinders, spheres, cubes, cones, and other basic forms. These shapes can act as construction guides.
5. What pencil is best for object sketching?
An HB or 2B pencil is a good starting point. HB is useful for lighter construction lines, while 2B can produce darker lines and shading.
6. How can I improve my object sketching skills?
Practice regularly, observe real objects carefully, compare proportions, draw objects from different angles, and practice light and shadow. Short daily sessions can be very effective.
7. Should I draw the outline first?
It is usually better to begin with light construction shapes and then refine the outer contour. Starting immediately with a heavy outline can make proportion corrections more difficult.
8. How do I make a simple object look three-dimensional?
Use accurate proportions, overlapping forms, perspective, light and shadow, and a cast shadow. These elements help communicate depth and volume.
9. Is object sketching useful for learning drawing?
Yes. Object sketching develops observation, proportion, contour, form, perspective, and shading skills that can be applied to many other types of drawing.
10. How long should I practice sketching objects?
Beginners can start with around 10–20 minutes a day. Consistent practice is generally more useful than occasional long drawing sessions.
11. Should beginners sketch from real objects or photographs?
Both can be useful. Real objects are particularly valuable because you can observe their three-dimensional form and move around them to study different angles.
12. How do I sketch a cup step by step?
Start with the opening as an oval, construct the body using simple curved lines, add the handle, refine the contour, and then add light, shadow, and a cast shadow.
13. How do I sketch a box?
Begin with the visible front, side, and top planes using simple geometric forms and perspective. Then refine the edges and add different values for light and shadow.
14. Can I learn object sketching without natural artistic talent?
Yes. Object sketching is a skill that can be developed through observation, practice, understanding shapes and proportions, and repeated drawing.
15. What should I sketch after learning simple objects?
After individual objects, try drawing the same objects from different angles, combining two or three objects, creating simple still life arrangements, and gradually moving toward more complex subjects.
Related Drawing Guides on SchoolApart
To continue learning, explore other beginner-friendly drawing lessons on SchoolApart:
- Basic Shapes in Drawing
- How to Draw Using Basic Shapes
- 5 Basic Shapes for Drawing
- Sketching vs Drawing: What’s the Difference?
- Step-by-Step Pencil Drawing: A Complete Beginner’s Guide
- Shading Techniques for Beginners
- Light and Shadow in Drawing
- Perspective Drawing Explained
- Drawing Mistakes Beginners Make
- How to Start Drawing Step by Step
Together, these guides can take you from basic drawing concepts to practical sketching exercises and more advanced drawing skills.
Leave a Reply