

Learn object sketching for beginners and discover how to draw what you see using observation, basic shapes, proportion, construction lines, perspective, and shading.
Object Sketching for Beginners: How to Draw What You See
Learning to draw what you actually see is one of the most important skills for any beginner artist.
You may already know how to draw basic shapes, simple objects, and easy pencil sketches. But there is another important step: learning how to observe an object carefully and translate what you see onto paper.
This is the foundation of object sketching.
Object sketching does not mean copying every tiny detail. Instead, it teaches you how to understand an object’s shape, proportion, structure, position, perspective, light, and shadow.
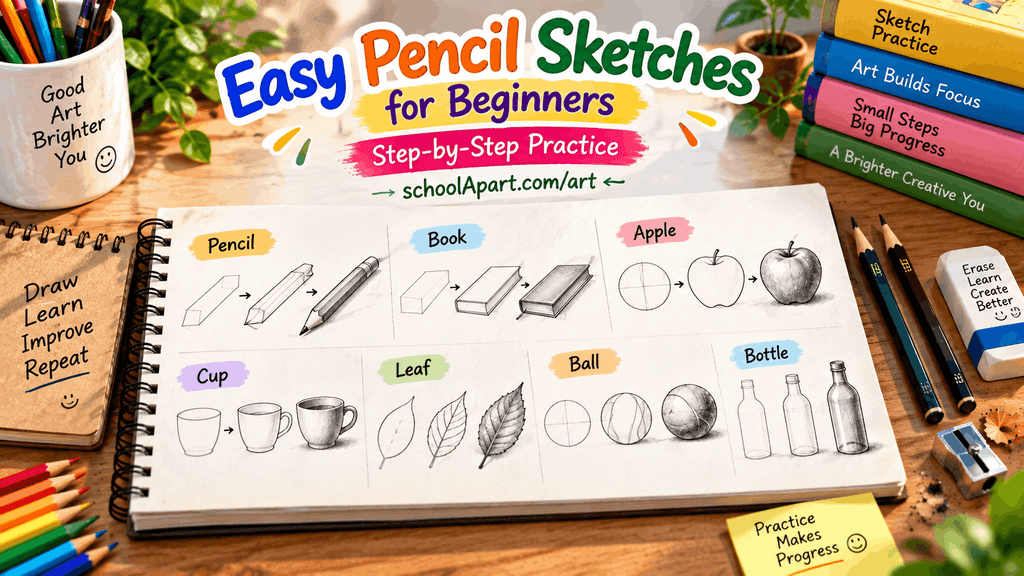
A simple cup, bottle, shoe, book, leaf, or toy can become an excellent drawing exercise when you learn how to observe it properly.
In this beginner-friendly guide, you will learn what object sketching is, how to draw what you see, how to observe proportions, how to simplify objects, how to use construction lines, how to sketch from different angles, common mistakes, and practical exercises to improve your observation skills.
What Is Object Sketching?
Object sketching is the practice of drawing an object by carefully observing its visible features and structure.
You can sketch:
- Everyday objects
- Household items
- School supplies
- Natural objects
- Toys
- Shoes
- Bottles
- Cups
- Books
- Plants
- Simple tools
The important part is not what you choose to draw.
The important part is how carefully you observe it.
For example, when sketching a cup, you need to notice:
- How wide the opening is
- How tall the cup is
- How the sides curve
- Where the handle is positioned
- Which side is darker
- Where the cast shadow falls
These observations help you create a more accurate sketch.
Why Is Object Sketching Important for Beginners?
Object sketching develops several fundamental drawing skills.
1. It Improves Observation
Drawing teaches you to look carefully.
Instead of thinking:
“This is a bottle.”
you begin to ask:
- How tall is it?
- Where is the widest part?
- How wide is the neck?
- Is it symmetrical?
- Which side is darker?
- What angle am I viewing it from?
This change in observation is one of the most important steps in learning to draw.
2. It Improves Proportion
Proportion refers to the size relationship between different parts of an object.
For example, a bottle may be three times as tall as its width.
If you make the bottle too wide, the drawing may look incorrect even if the details are good.
Object sketching gives you regular opportunities to practice these relationships.
3. It Develops Hand-Eye Coordination
Your eyes observe the object while your hand translates that information into lines.
With practice, your hand becomes better at following what your eyes see.
4. It Helps You Understand Form
A drawing should not always be thought of as a flat outline.
Objects have:
- Width
- Height
- Depth
- Curves
- Planes
- Surfaces
Object sketching helps you understand these three-dimensional qualities.
5. It Builds a Foundation for Other Art Skills
Observation-based sketching can help with:
- Portrait drawing
- Nature drawing
- Still life
- Illustration
- Cartoon drawing
- Painting
- Digital art
The better you become at seeing shapes and proportions, the easier many other drawing tasks can become.
What Do You Need for Object Sketching?
You can begin with very simple materials.
Essential Supplies
- Sketchbook or drawing paper
- HB pencil
- 2B pencil
- Eraser
- Pencil sharpener
Optional Supplies
- 4B pencil
- Kneaded eraser
- Blending stump
- Ruler
- Pencil case
You do not need expensive art supplies.
For beginners, the most important tool is actually careful observation.
How to Choose an Object for Sketching
Not every object is equally suitable for your first practice session.
Start with objects that have relatively simple forms.
Good Beginner Objects
- Pencil
- Book
- Cup
- Bottle
- Apple
- Ball
- Spoon
- Bowl
- Leaf
- Shoe
- Simple toy
- Small box
Avoid highly detailed objects at first.
Once your observation skills improve, you can gradually choose more complicated subjects.
The Most Important Rule: Look Before You Draw
One of the most common beginner mistakes is picking up a pencil and immediately drawing.
Instead, spend some time looking.
Before making your first line, ask:
What is the overall shape?
Is it:
- Round?
- Long?
- Wide?
- Thin?
- Angular?
- Curved?
What is the overall proportion?
Compare:
- Height vs width
- Top vs bottom
- Large parts vs small parts
What are the major forms?
Can you identify:
- Sphere
- Cylinder
- Cube
- Cone
- Rectangle
- Oval
Where is the light?
Find:
- Highlight
- Light area
- Midtone
- Shadow
- Cast shadow
This observation stage can make the actual drawing much easier.
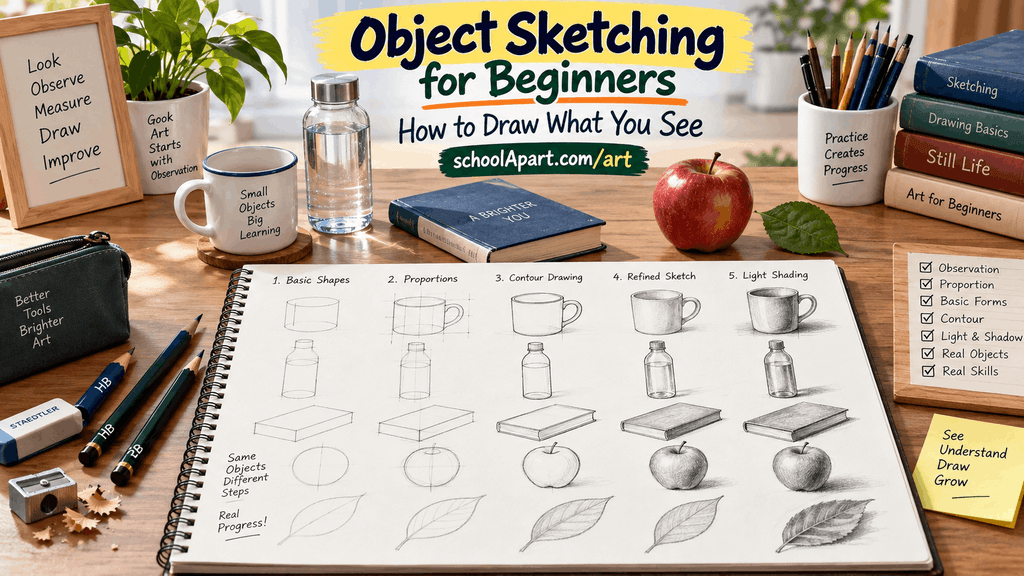
How to Draw What You See: Step-by-Step
Here is a simple process you can use for almost any object.
Step 1: Observe the Object
Look at the object from your chosen viewpoint.
Do not draw yet.
Study its:
- Shape
- Size
- Position
- Curves
- Angles
- Light
- Shadow
Step 2: Decide the Viewing Angle
Your drawing will change depending on where you are sitting.
For example, a cup viewed from above will show more of its opening than a cup viewed from eye level.
Before drawing, decide:
What exactly am I looking at?
Try not to change your viewpoint repeatedly while sketching.
Step 3: Estimate the Bounding Box
Imagine a simple rectangle around the object.
Determine:
- Highest point
- Lowest point
- Leftmost point
- Rightmost point
This imaginary boundary helps you control the overall size.
Step 4: Find the Centerline
For objects that are symmetrical, a centerline can be extremely helpful.
Examples include:
- Bottle
- Cup
- Vase
- Jar
- Lamp
Lightly draw an imaginary or visible vertical centerline.
Then compare both sides.
Step 5: Identify Basic Forms
Break the object into simple forms.
For example:
Bottle → cylinders + curved forms
Mug → cylinder + handle
Ball → sphere
Book → rectangular prism
Bowl → curved form + oval
Pencil → long cylindrical or polygonal form
This simplifies the drawing process.
Step 6: Draw Construction Lines
Use light pencil pressure.
Draw the basic structure first.
Do not worry about details.
At this stage, your drawing may look like a collection of simple shapes.
That is exactly what you want.
Step 7: Check Proportions
Stop and compare your sketch with the real object.
Ask:
- Is it too tall?
- Is it too wide?
- Is the top too large?
- Is the bottom too narrow?
- Are the parts positioned correctly?
Correct the structure now.
Step 8: Refine the Contour
Once the construction is accurate, begin refining the outer contour.
Pay attention to:
- Curves
- Corners
- Edges
- Changes in direction
- Uneven shapes
Try to avoid drawing with many random short strokes.
Step 9: Add Important Details
Now add the details that make the object recognizable.
Do not add every tiny mark.
Ask:
“Which details are actually important?”
For a shoe, for example, you may need:
- Sole
- Laces
- Opening
- Main panels
But you do not need to draw every tiny texture immediately.
Step 10: Observe Light and Shadow
Now study the lighting.
Identify:
Highlight → Light → Midtone → Shadow → Cast Shadow
Do not automatically shade the side you think should be dark.
Look at the actual object.
Step 11: Add Shading
Build the darker areas gradually.
Start lightly and add more layers where needed.
Avoid making the entire drawing equally dark.
Different values help communicate form.
Shading Techniques for Beginners: A Complete Step-by-Step Guide
Step 12: Compare and Correct
At the end, compare your sketch with the reference object.
Look for:
- Shape differences
- Proportion problems
- Missing details
- Incorrect angles
- Incorrect shadows
Make small corrections.
This comparison is an important part of learning.
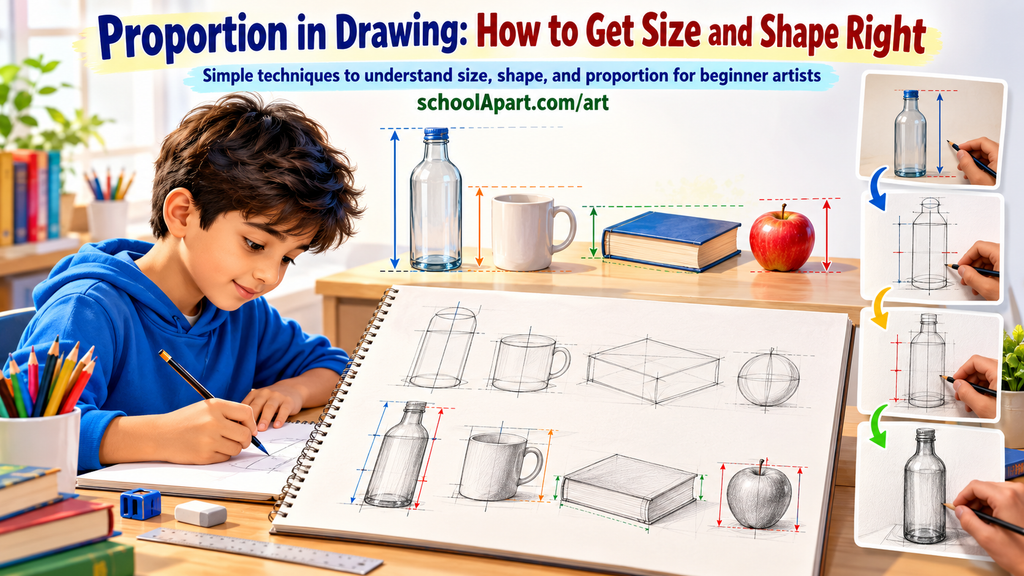
How to Observe Proportion
Proportion is one of the most important skills in object sketching.
Imagine you are drawing a bottle.
Instead of trying to guess every measurement separately, compare parts.
For example:
Total height = approximately 3 × maximum width
Then compare:
- Neck height
- Shoulder width
- Body width
- Base width
This makes the drawing more consistent.
Comparing Measurements Visually
You can use a pencil to help estimate proportions.
Hold your pencil at arm’s length and use it as a simple measuring reference.
For example, you can estimate:
- Overall height
- Overall width
- Relative size of parts
This does not need to be mathematically exact.
It simply helps your eyes compare relationships.
How to Sketch Objects from Different Angles
One of the best object-sketching exercises is drawing the same object from different viewpoints.
Take a cup.
Draw it:
- From eye level
- Slightly from above
- From the side
- From a lower viewpoint
Notice how the visible shapes change.
This teaches you that you are not memorizing a drawing of a cup.
You are learning to observe a cup from a particular viewpoint.
Understanding Ellipses When Drawing Objects
Ellipses are particularly important when drawing cylindrical objects.
You will encounter them in:
- Cups
- Bowls
- Bottles
- Jars
- Cans
- Buckets
An ellipse viewed from a lower angle may appear wider.
An ellipse viewed from a higher angle can appear flatter or more open depending on the viewpoint.
Practice drawing several ellipses with different widths.
This can significantly improve your ability to sketch everyday objects.
How to Sketch a Cup by Observation
Let’s apply the process to a real object.
Step 1
Place a cup in front of you.
Step 2
Observe its overall height and width.
Step 3
Lightly draw the top ellipse.
Step 4
Add the side contours.
Step 5
Construct the bottom.
Step 6
Add the handle.
Step 7
Check the proportions.
Step 8
Refine the contour.
Step 9
Observe the light source.
Step 10
Add shading and the cast shadow.
Notice that you did not start by drawing the handle or tiny details.
You started with the overall structure.
How to Sketch a Bottle by Observation
A bottle is particularly useful for practicing symmetry.
Start with:
- Overall height
- Maximum width
- Centerline
Then identify:
- Neck
- Cap
- Shoulder
- Body
- Base
Build each part around the centerline.
After the structure is correct, remove or soften the construction line and add shading.
How to Sketch a Book by Observation
A book helps you understand straight edges and perspective.
Observe:
- Front edge
- Side edge
- Top surface
- Spine
- Page thickness
Start with the largest visible planes.
Then add the smaller details.
Avoid making every line perfectly horizontal or vertical if the reference is viewed from an angle.
How to Sketch a Shoe by Observation
A shoe is more challenging because it has many curves.
Start by identifying:
- Overall length
- Overall height
- Sole
- Main upper form
- Opening
Then gradually add:
- Laces
- Panels
- Seams
- Other important details
Do not begin with the laces.
The overall shoe structure should come first.
How to Sketch Natural Objects
Natural objects are excellent for observation practice because they are rarely perfectly geometric.
Try:
- Leaves
- Flowers
- Fruits
- Stones
- Branches
- Shells
When drawing natural objects, avoid making every side perfectly symmetrical.
Observe the small irregularities.
These imperfections often make the sketch more believable.
Object Sketching Practice Exercises
Exercise 1: One Object, Ten Minutes
Choose one object.
Spend:
- 2 minutes observing
- 3 minutes constructing
- 3 minutes refining
- 2 minutes shading
Repeat this exercise several times a week.
Exercise 2: Same Object, Different Angles
Choose a cup, bottle, or book.
Draw it from three different viewpoints.
This develops spatial observation.
Exercise 3: Shape Breakdown
Choose an object and write down its basic forms before drawing.
For example:
Mug = cylinder + oval + curved handle
Then construct the drawing.
Exercise 4: Proportion Practice
Choose a bottle or vase.
Focus only on:
- Height
- Width
- Centerline
- Major divisions
Do not add detailed shading.
Exercise 5: Light and Shadow Study
Place one object near a light source.
Sketch only the major light and dark areas.
This helps you understand form without becoming distracted by details.
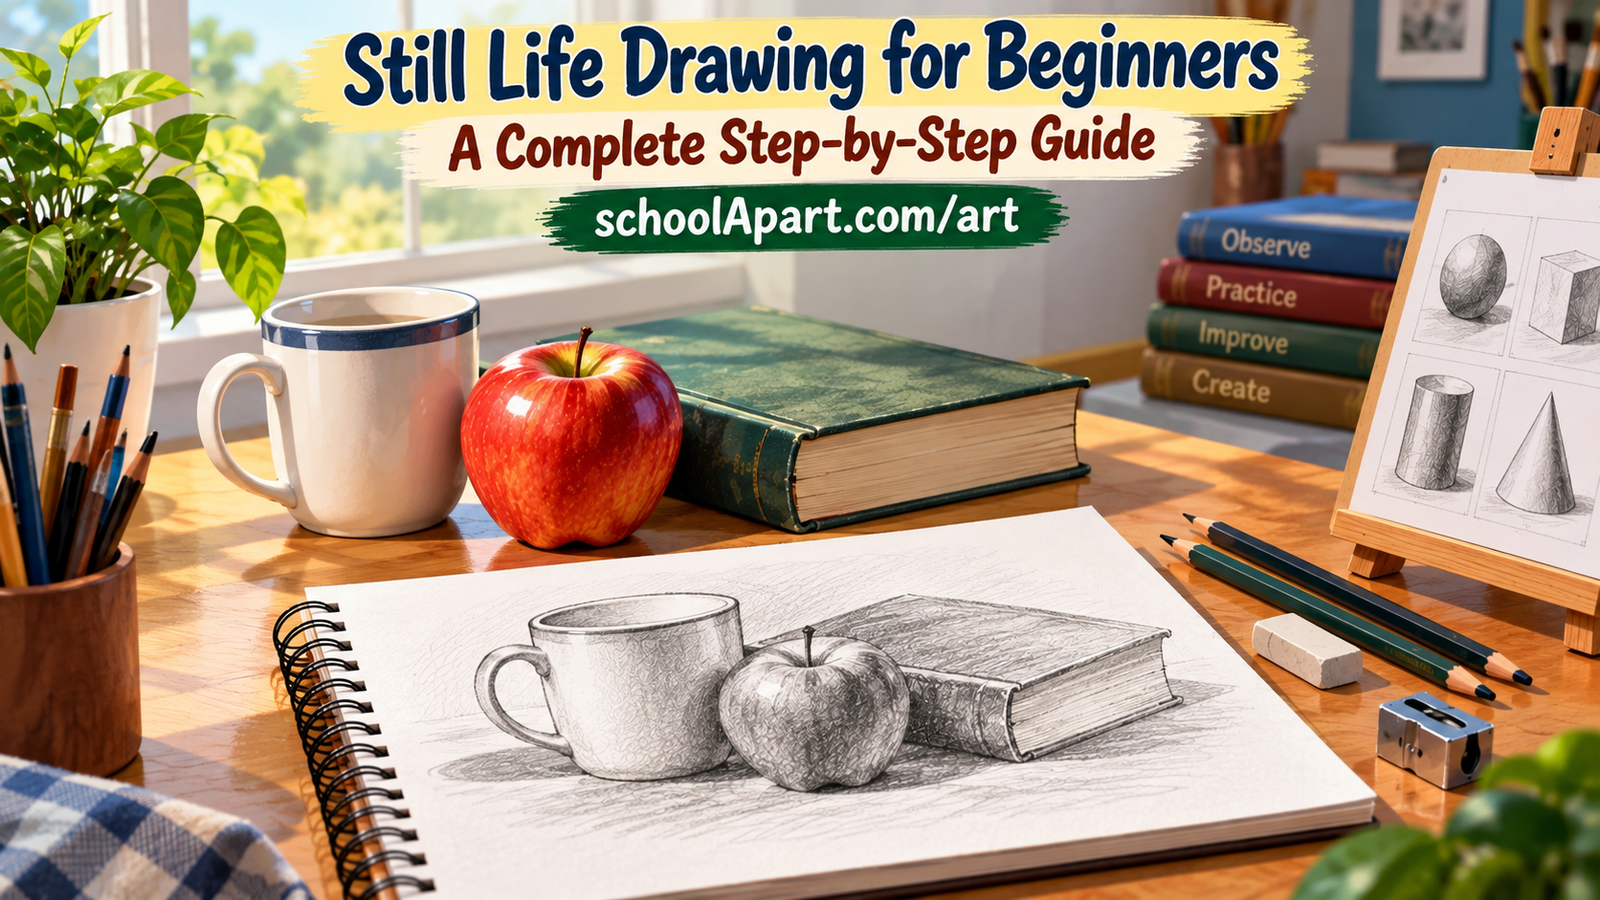
Exercise 6: Three-Object Study
Arrange three simple objects.
For example:
- Cup
- Book
- Apple
Draw them together.
Now you need to observe not only each object but also:
- Relative size
- Position
- Overlap
- Spacing
- Cast shadows
This is an excellent step toward still life drawing.
A 7-Day Object Sketching Practice Plan
Day 1 — Pencil
Focus on straight lines and proportion.
Day 2 — Cup
Practice curves and ellipses.
Day 3 — Apple
Practice organic form and shading.
Day 4 — Bottle
Practice symmetry and proportion.
Day 5 — Book
Practice perspective and straight edges.
Day 6 — Leaf or Flower
Practice irregular natural forms.
Day 7 — Three Objects
Create a simple still life arrangement.
The purpose is not to create seven perfect drawings.
The purpose is to practice seeing.
Common Object Sketching Mistakes
1. Drawing What You Think the Object Looks Like
Your brain already has a simplified symbol for many objects.
For example, you may think:
“A cup is just a cylinder with a handle.”
But the real cup may have subtle curves and perspective changes.
Solution: Draw what you actually observe.
2. Starting With Details
Beginners often start with:
- Buttons
- Laces
- Labels
- Patterns
- Small textures
Solution: Establish the overall structure first.
3. Ignoring the Viewing Angle
An object viewed from above does not look the same as an object viewed from eye level.
Solution: Decide your viewpoint before drawing.
4. Drawing Heavy Construction Lines
Dark construction lines make corrections difficult.
Solution: Keep early lines light.
5. Making Objects Perfectly Symmetrical
Real objects may contain small irregularities.
Solution: Observe rather than assume.
6. Adding Too Much Detail
More detail does not automatically mean a better drawing.
Solution: Focus on the details that actually communicate the object’s structure.
7. Ignoring Negative Space
The empty space around and between parts of an object can help you judge proportions.
Solution: Observe both the object and the spaces surrounding it.
What Is Negative Space in Object Sketching?
Negative space is the empty area around or between objects.
For example, when drawing a mug with a handle, the hole inside the handle is a form of negative space.
Instead of looking only at the handle, observe the shape of the empty space.
Sometimes it is easier to judge the negative space than the object itself.
This is a useful observation technique for beginners.
How to Improve Your Observation Skills
Slow Down
You do not need to finish every sketch quickly.
Spend more time looking.
Compare Constantly
Look back and forth between your object and drawing.
Ask Questions
Instead of saying:
“This looks wrong.”
ask:
“Is the top too wide?”
“Is the object too tall?”
“Is the centerline in the correct position?”
Specific questions make corrections easier.
Draw From Real Objects
Whenever possible, use objects around you.
Repeat the Same Subject
Drawing the same cup several times can teach you more than drawing five unrelated subjects once each.
Object Sketching and Still Life Drawing
Object sketching often begins with one object.
Still life drawing usually involves several objects arranged together.
For example:
One apple → Object sketch
Apple + cup → Simple still life
Apple + cup + book + vase → More developed still life
Learning to observe individual objects first makes it easier to understand relationships between multiple objects.
What Should You Practice After Object Sketching?
Once you become comfortable with observation-based object sketching, you can move toward:
- Still life drawing
- Contour drawing
- Proportion studies
- Gesture drawing
- Composition
- More detailed pencil drawings
- Portrait drawing
- Illustration
These skills build on the observation habits you develop through object sketching.
Final Tips for Beginner Object Sketchers
Remember these principles:
- Observe before drawing.
- Start with the overall shape.
- Estimate height and width.
- Use basic forms to understand structure.
- Keep construction lines light.
- Check proportions before details.
- Pay attention to the viewing angle.
- Study negative space.
- Observe real light and shadow.
- Do not rush.
- Draw the same object more than once.
- Keep your sketches and compare them over time.
The goal is not simply to draw an object.
The real goal is to learn how to see an object like an artist.
Once you learn to notice shapes, proportions, angles, forms, spaces, and light, everyday objects become valuable drawing lessons.
Key Takeaways
Object sketching is an important beginner drawing exercise because it teaches you how to translate observation into lines and shapes.
A simple process is:
Observe → Measure → Simplify → Construct → Check → Refine → Shade → Compare
Start with easy objects such as pencils, books, cups, bottles, apples, and leaves.
Do not worry if your first sketches are imperfect. Accurate observation develops gradually through repeated practice.
Every object around you can become a drawing exercise—and the more carefully you learn to look, the more confidently you will learn to draw.
FAQ
1. What is object sketching?
Object sketching is the practice of drawing an object by carefully observing its shape, proportion, structure, position, and light and shadow.
2. How do beginners start object sketching?
Start with a simple real object, observe it carefully, estimate its height and width, identify basic forms, draw light construction lines, refine the contour, and then add details and shading.
3. What objects are easiest to sketch?
Pencils, books, cups, bottles, apples, balls, leaves, bowls, and simple boxes are excellent objects for beginners.
4. What does “draw what you see” mean?
It means observing the actual shapes, proportions, angles, and values of an object instead of drawing the simplified version you remember from memory.
5. Why is observation important in drawing?
Observation helps you understand the actual proportions, shapes, relationships, and lighting of a subject. This can make drawings more accurate.
6. Should I use basic shapes when sketching objects?
Yes. Basic shapes such as circles, ovals, rectangles, cylinders, spheres, and cubes can help you construct the overall form of an object.
7. How do I improve my object drawing?
Practice regularly from real objects, compare proportions, draw from different angles, study light and shadow, and review your sketches after completing them.
8. How can I check the proportion of an object?
Compare the object’s height and width and then compare the relative sizes of its different parts. You can also use your pencil as a simple visual measuring tool.
9. What is a construction line?
A construction line is a light preliminary line used to establish the structure, proportion, alignment, or basic form of a drawing.
10. Why should construction lines be light?
Light construction lines are easier to correct or erase as you refine the drawing.
11. Can I learn object sketching from photographs?
Yes. Photographs are useful references, especially when a real object is not available. However, drawing from real objects can provide valuable three-dimensional observation practice.
12. How do I sketch a bottle accurately?
Start by estimating its overall height and width, establish a centerline, identify the neck, shoulder, body, and base, then refine the contour and add shading.
13. What is negative space in drawing?
Negative space is the empty area around or between objects and their parts. Observing these spaces can help you judge proportions and shapes more accurately.
14. Is object sketching the same as still life drawing?
Not exactly. Object sketching often focuses on one object, while still life drawing usually involves multiple arranged objects.
15. How long should I practice object sketching?
Even 10–20 minutes of regular practice can be useful for beginners. Consistency is more important than occasional long drawing sessions.
Leave a Reply