

Avoid the most common beginner drawing mistakes with this complete guide. Learn 20 drawing mistakes, why they happen, and practical tips to improve your drawing skills faster.
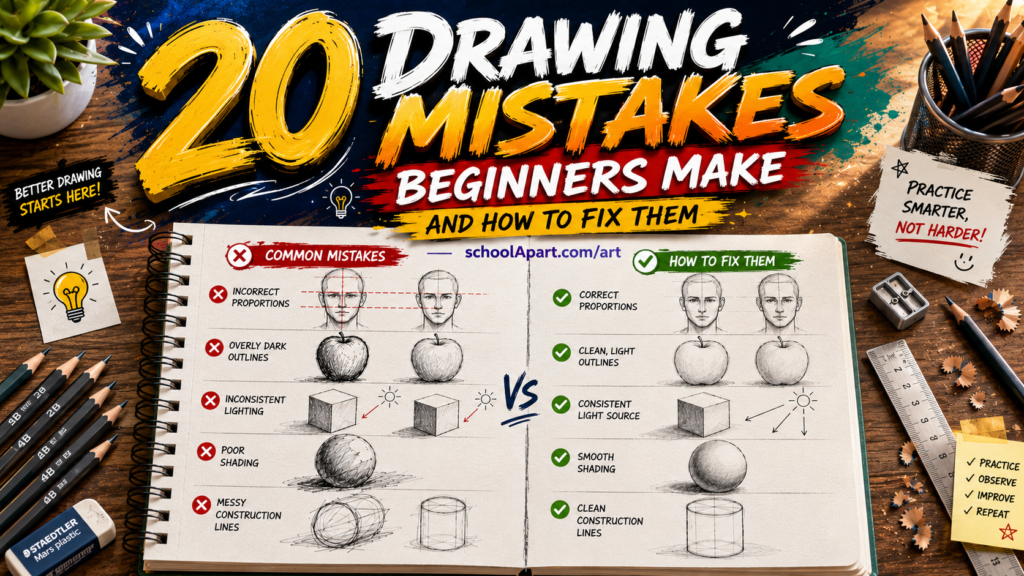
Drawing Mistakes Beginners Make: 20 Common Mistakes and How to Fix Them
Learning to draw is an exciting journey, but every beginner makes mistakes along the way. In fact, making mistakes is one of the most important parts of becoming a better artist.
Many people become frustrated because their drawings don’t look the way they imagined. They often believe they lack talent, when in reality they’re simply repeating a few common beginner mistakes.
The good news is that these mistakes are completely normal—and most of them are easy to fix once you understand what causes them.
In this guide, you’ll discover the 20 most common drawing mistakes beginners make, why they happen, and practical techniques to correct them. Whether you’re a school student, hobby artist, or someone returning to drawing after a long break, these tips will help you improve your skills more quickly.
Why Do Beginners Make Drawing Mistakes?
Every artist starts as a beginner.
Drawing involves several skills that develop over time, including:
- Observation
- Hand control
- Understanding shapes
- Proportion
- Perspective
- Light and shadow
- Patience
Beginners usually struggle because they’re trying to master all of these skills at once.
The key is not to avoid mistakes—it is to learn from them.
Mistake #1: Pressing the Pencil Too Hard
One of the most common beginner mistakes is pressing the pencil too hard from the very first line.
Heavy lines make it difficult to:
- Correct mistakes
- Erase guidelines
- Add smooth shading
- Refine proportions
Your drawing quickly becomes messy.
How to Fix It
Start every drawing using light, loose strokes.
Think of your first lines as temporary guides rather than permanent outlines.
Gradually darken the final lines only after you’re satisfied with the structure.
Practice Exercise
Draw ten simple circles using very light pressure.
Then slowly darken only the best circle.
This exercise improves pencil control.
Mistake #2: Skipping Basic Shapes
Many beginners immediately start drawing details like eyes, hair, leaves, or clothing.
Professional artists rarely work this way.
Instead, they simplify everything into basic shapes first.
For example:
An apple starts as a circle.
A house begins with rectangles and triangles.
A human body starts with simple cylinders and ovals.
Ignoring this step often leads to incorrect proportions.
How to Fix It
Before adding details:
- Identify simple shapes.
- Sketch those shapes lightly.
- Check their size and position.
- Refine the drawing gradually.
Always remember:
Complex drawings are built from simple shapes.
Mistake #3: Drawing What You Think Instead of What You See
Our brain stores simplified versions of familiar objects.
For example:
When asked to draw an eye, many beginners draw a football-shaped symbol instead of observing a real eye.
This habit produces unrealistic drawings.
How to Fix It
Train yourself to observe carefully.
Ask questions like:
- What shape is this?
- How long is it?
- Where is the darkest area?
- What angle does this line follow?
Drawing from observation almost always produces better results than drawing from memory.
Practice Exercise
Place a mug or fruit on your desk.
Spend two minutes observing it before making the first pencil mark.
Mistake #4: Ignoring Proportions
A face with oversized eyes.
Tiny hands.
Very long legs.
A tree with a trunk that’s too thin.
These are proportion mistakes.
Correct proportions make drawings believable.
How to Fix It
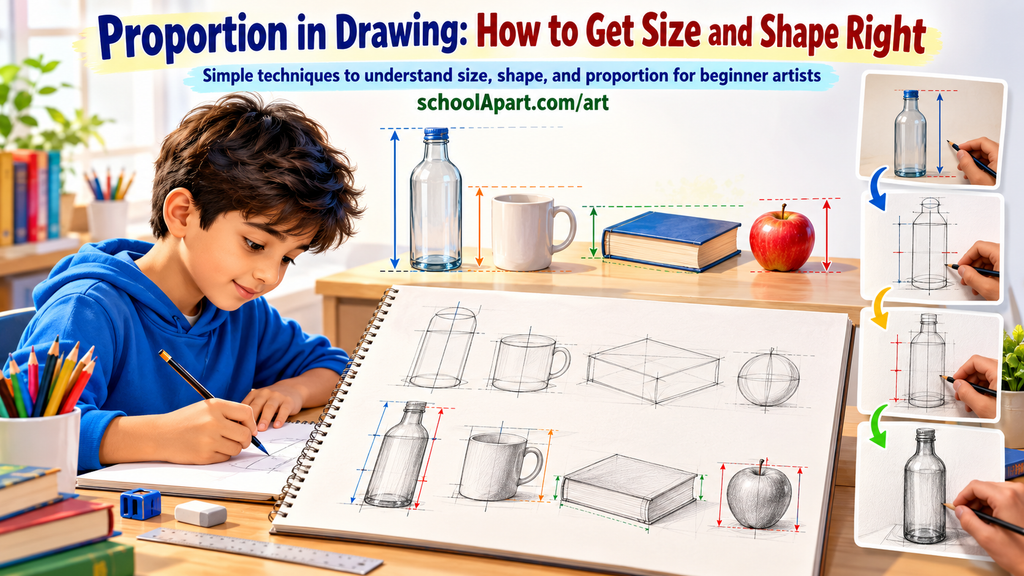
Compare different parts before drawing.
For example:
- Is the object taller than it is wide?
- Which part is larger?
- How far apart are these two features?
Professional artists constantly compare measurements while drawing.
Helpful Tip
Use very light guideline lines to divide your subject into sections.
These guides can be erased later.
Mistake #5: Starting with Small Details
Many beginners begin by drawing:
- Eyes
- Hair
- Fingers
- Leaves
- Decorative patterns
Unfortunately, these details may later need to be erased if the overall structure is incorrect.
How to Fix It
Follow this order:
- Overall shape
- Basic structure
- Proportions
- Large forms
- Medium details
- Small details
- Final shading
This workflow saves time and produces cleaner drawings.
Mistake #6: Using the Eraser Too Often
Some beginners erase every imperfect line.
As a result:
- The paper becomes damaged.
- The drawing loses confidence.
- Progress becomes very slow.
Remember:
Professional artists also create imperfect sketches.
How to Fix It
Treat mistakes as part of the learning process.
Instead of erasing immediately:
- Continue sketching lightly.
- Compare your lines.
- Adjust gradually.
Erase only when necessary.
Good Habit
Keep your construction lines light enough that they can easily disappear later.
Mistake #7: Choosing Subjects That Are Too Difficult
Many beginners attempt to draw:
- Realistic portraits
- Wild animals
- Complex city scenes
- Cars
- Hands
- Human anatomy
These subjects require advanced skills.
Failing repeatedly can reduce motivation.
How to Fix It
Start with simple objects.
Examples include:
- Apple
- Cup
- Ball
- Pencil
- Book
- Plant
- Bottle
After mastering simple objects, gradually move toward:
- Flowers
- Trees
- Animals
- Faces
- People
Learning step by step builds confidence and develops strong fundamentals.
Beginner Improvement Tips
If you’re new to drawing, these habits can help you progress faster:
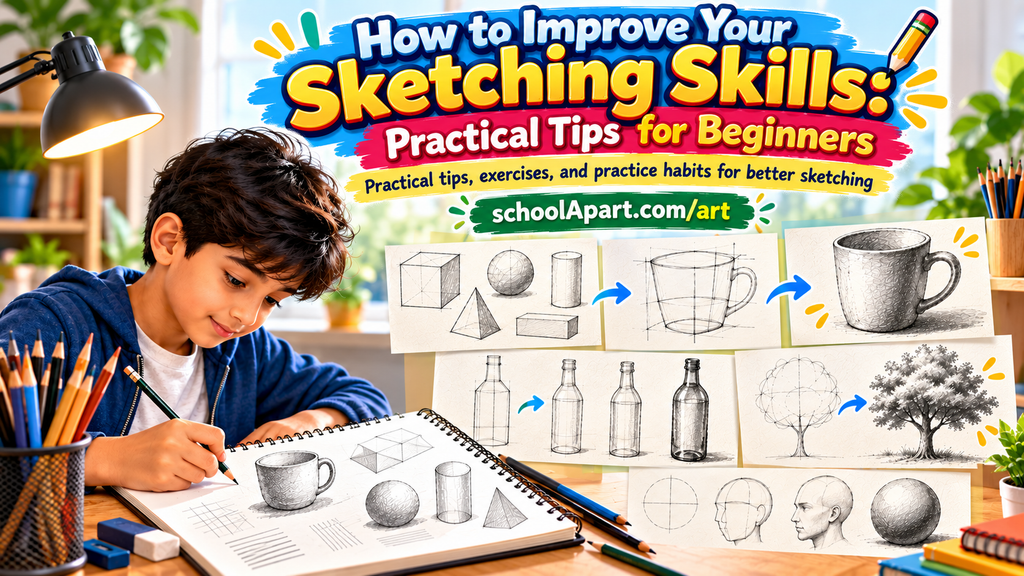
- Draw something every day, even if it’s only for 15–20 minutes.
- Keep a sketchbook dedicated to practice.
- Focus on learning, not perfection.
- Study real objects instead of drawing only from imagination.
- Compare your newest drawings with older ones to see your progress.
- Celebrate small improvements rather than expecting instant results.
Progress Over Perfection
Every experienced artist has hundreds—even thousands—of imperfect sketches hidden in old sketchbooks.
The difference is that they kept practicing.
Instead of asking:
“Why isn’t my drawing perfect?”
Ask:
“What can I improve in my next drawing?”
That mindset will help you grow much faster as an artist.
Mistake #8: Ignoring the Light Source
One of the biggest reasons beginner drawings look flat is because the artist doesn’t decide where the light is coming from.
Without a clear light source:
- Shadows appear random.
- Highlights look unnatural.
- Objects lose their three-dimensional appearance.
How to Fix It
Before shading, always ask yourself:
“Where is the light coming from?”
Choose one direction.
Examples:
- Light from the left
- Light from the right
- Light from above
- Light from behind
Keep the lighting consistent throughout the drawing.
Practice Exercise
Draw a simple sphere and imagine the light coming from the top-left corner.
Add:
- Highlight
- Mid-tone
- Core shadow
- Cast shadow
Repeat using different light directions.
Mistake #9: Poor Shading
Many beginners create shading by randomly darkening parts of a drawing.
This often makes artwork look messy instead of realistic.
Good shading follows the form of an object.
How to Fix It
Learn basic shading techniques:
- Hatching
- Cross-hatching
- Blending
- Stippling
Start with smooth transitions from light to dark.
Avoid making every area equally dark.
Practice Exercise
Create a value scale with ten different tones, from pure white to almost black.
This develops pencil pressure control.
Mistake #10: Ignoring Perspective
Perspective gives depth to a drawing.
Without it:
- Buildings look crooked.
- Roads appear flat.
- Boxes look unrealistic.
Many beginners skip perspective because it seems difficult.
How to Fix It
Start with one-point perspective.
Practice drawing:
- Roads
- Hallways
- Railway tracks
- Cubes
Once comfortable, move to:
- Two-point perspective
- Three-point perspective
Learning perspective early makes complex drawings much easier.
Mistake #11: Outlining Everything with Dark Lines
Some beginners use thick, dark outlines around every object.
While this works for some cartoon styles, it often makes realistic drawings appear flat.
Real objects don’t usually have visible black outlines.
How to Fix It
Instead of outlining everything:
- Use softer edges.
- Let shading define the form.
- Darken only important areas.
This creates a more natural appearance.
Mistake #12: Drawing Too Fast
Many beginners rush to finish a drawing.
They skip observation, ignore proportions, and miss important details.
Drawing is not a race.
How to Fix It
Slow down.
Spend more time:
- Observing
- Measuring
- Comparing
- Correcting
Remember:
A well-planned drawing usually takes less time than fixing a rushed one.
Mistake #13: Practising Only One Subject
Some beginners draw only anime.
Others draw only flowers.
Some only sketch cartoon characters.
While specialization is valuable later, beginners should explore different subjects.
How to Fix It
Practice drawing a variety of objects.
Examples:
- Fruits
- Trees
- Animals
- Faces
- Buildings
- Household objects
Different subjects teach different skills.
Mistake #14: Comparing Yourself with Professional Artists
Social media makes it easy to compare your work with artists who have practiced for many years.
This comparison often leads to frustration.
Remember:
You’re comparing your beginning with someone else’s experience.
How to Fix It
Compare your work only with your previous drawings.
Ask yourself:
- Are my proportions improving?
- Is my shading smoother?
- Do my sketches feel more confident?
Small improvements matter.
Mistake #15: Practising Without a Plan
Many beginners simply draw whatever comes to mind.
Although this can be enjoyable, it may slow long-term improvement.
A structured routine develops skills more efficiently.
How to Fix It
Divide your practice into categories.
Example:
Monday
Lines and hand control
Tuesday
Basic shapes
Wednesday
Shading practice
Thursday
Perspective
Friday
Simple objects
Saturday
Nature drawing
Sunday
Complete drawing and review
A balanced routine helps improve every aspect of drawing.
Daily Drawing Habits That Build Strong Skills
Improvement comes from consistent habits rather than occasional long sessions.
Warm Up First
Spend 5–10 minutes drawing:
- Straight lines
- Circles
- Curves
- Cubes
This prepares your hand before starting a full drawing.
Draw from Real Objects
Photographs are useful, but real objects teach observation more effectively.
Practice with:
- Cups
- Fruits
- Books
- Plants
- Shoes
Real-life observation strengthens visual understanding.
Finish Your Drawings
Some beginners abandon every drawing halfway through.
Even if a drawing isn’t perfect, completing it teaches valuable lessons about shading, details, and composition.
Keep Every Sketch
Don’t throw away unsuccessful drawings.
Older sketches become a record of your progress.
Looking back after several months can be highly motivating.
A Simple 20-Minute Daily Practice Routine
If you’re busy with school or work, even 20 minutes can make a difference.
5 Minutes
- Straight lines
- Circles
- Basic shapes
5 Minutes
- Shading exercises
- Value scale
- Pencil control
10 Minutes
Draw one object from real life.
Examples:
- Apple
- Bottle
- Mug
- Plant
Consistency matters more than long, irregular practice sessions.
How to Evaluate Your Own Drawings
After finishing a drawing, ask yourself these questions:
- Are the proportions accurate?
- Is the light source consistent?
- Does the shading create depth?
- Did I start with simple shapes?
- Are the details balanced?
- Is the composition clean?
- What one thing can I improve next time?
This simple self-review builds stronger artistic awareness.
Signs That You’re Improving
Progress isn’t always obvious day by day.
Look for these positive signs:
- Your lines become smoother.
- Shapes become more accurate.
- Shading looks softer and more natural.
- You spend less time correcting mistakes.
- You notice details more easily.
- Drawing feels more enjoyable.
These are all indicators that your skills are growing.
Mistake #16: Being Afraid to Make Mistakes
Many beginners hesitate to draw because they’re afraid of creating a “bad” drawing.
Ironically, this fear slows improvement more than any technical mistake.
Every professional artist has filled countless sketchbooks with imperfect drawings before creating great artwork.
How to Fix It
Accept that mistakes are part of learning.
Instead of aiming for perfection, aim to learn something from every drawing.
Remember:
Every finished drawing teaches you more than an unfinished perfect idea.
Mistake #17: Copying Without Understanding
Copying artwork can be useful for practice, but many beginners only copy the final appearance instead of understanding the structure behind it.
As a result, they struggle to draw similar subjects without a reference.
How to Fix It
When studying another drawing, ask yourself:
- What basic shapes were used?
- Where is the light source?
- Why was this shadow placed here?
- How are the proportions measured?
- Which lines are construction lines?
Study the process, not just the finished artwork.
Mistake #18: Ignoring Composition
Some drawings contain well-drawn objects but still feel unbalanced.
This often happens because the composition hasn’t been planned.
Common composition problems include:
- Subject placed too close to the edge
- Too much empty space
- Poor balance
- Confusing focal point
How to Fix It
Before drawing details:
- Decide where the main subject should be.
- Leave comfortable margins.
- Think about where the viewer’s eye should look first.
- Keep the composition simple.
Planning for just one minute can significantly improve the final artwork.
Mistake #19: Expecting Instant Results
Many beginners expect dramatic improvement within a few days.
When progress feels slow, they become discouraged.
Drawing is a long-term skill that develops gradually.
How to Fix It
Focus on consistent improvement rather than quick results.
Celebrate small achievements, such as:
- Cleaner lines
- Better circles
- Improved shading
- More accurate proportions
- Greater confidence
Small improvements add up over time.
Mistake #20: Not Enjoying the Process
Some beginners become so focused on creating perfect drawings that they forget to enjoy making art.
Drawing should be both educational and enjoyable.
How to Fix It
Draw subjects you genuinely enjoy.
Try:
- Animals
- Nature
- Cartoon characters
- Buildings
- Fantasy scenes
- Everyday objects
When you enjoy practicing, you’re more likely to stay consistent—and consistency is the key to improvement.
Beginner Drawing Improvement Checklist
Before finishing any drawing, review this checklist.
✔ Started with simple shapes
✔ Used light construction lines
✔ Checked proportions
✔ Observed the reference carefully
✔ Identified the light source
✔ Added realistic shading
✔ Avoided unnecessary dark outlines
✔ Drew patiently
✔ Focused on overall structure before details
✔ Finished the drawing
✔ Reviewed mistakes
✔ Learned something new
7 Rules Every Beginner Artist Should Follow
1. Draw Every Day
Even 15–20 minutes of daily practice is more effective than several hours once a week.
2. Observe Before Drawing
Spend time studying your subject before making the first pencil mark.
Observation is one of the most valuable artistic skills.
3. Build with Simple Shapes
Every complex object can be simplified into basic forms.
Learning shapes makes drawing easier and more accurate.
4. Practice Fundamentals Regularly
Continue practicing:
- Lines
- Shapes
- Perspective
- Shading
- Proportion
Strong fundamentals support every style of drawing.
5. Keep a Sketchbook
Use one sketchbook exclusively for practice.
Fill every page without worrying about perfection.
A finished sketchbook is a record of your artistic growth.
6. Learn from Mistakes
Instead of asking,
“Why is my drawing bad?”
Ask,
“What can I improve next time?”
This mindset encourages continuous improvement.
7. Be Patient
Drawing is a lifelong skill.
Progress may feel slow at times, but every practice session builds experience and confidence.
Key Takeaways
- Every beginner makes drawing mistakes.
- Mistakes are valuable learning opportunities.
- Light construction lines improve accuracy.
- Basic shapes create strong drawings.
- Observation is more important than memory.
- Correct proportions make artwork look realistic.
- Light and shadow create depth.
- Perspective improves realism.
- Daily practice is more effective than occasional long sessions.
- Progress comes from consistency, patience, and curiosity.
Frequently Asked Questions (FAQ)
1. Is it normal to make mistakes while learning to draw?
Yes. Every artist makes mistakes, especially during the learning process. Mistakes help you identify what to practice next.
2. Why do my drawings look unrealistic?
Common reasons include incorrect proportions, weak observation skills, inconsistent lighting, and limited practice.
3. Should I erase every mistake?
No. Light construction lines allow you to adjust your drawing gradually. Erase only when necessary.
4. Why should I start with basic shapes?
Basic shapes provide the foundation for more complex forms, making drawings more accurate and easier to refine.
5. How can I improve my shading?
Practice value scales, observe real light sources, and use techniques like hatching, cross-hatching, and blending.
6. Why is perspective important?
Perspective creates the illusion of depth, making scenes and objects appear more realistic.
7. How often should beginners practice drawing?
Practicing for 20–30 minutes most days of the week is an effective routine for steady improvement.
8. Should I draw from imagination or real life?
Both are valuable, but beginners benefit greatly from drawing real objects because it strengthens observation skills.
9. How long does it take to improve at drawing?
Improvement depends on consistent practice. Many beginners notice progress within a few weeks, while advanced skills develop over months and years.
10. Can I learn drawing without an art teacher?
Yes. Books, online tutorials, structured practice, and regular self-review can help you build strong drawing skills.
11. What’s the biggest mistake beginners make?
Rushing into details before establishing the overall structure is one of the most common mistakes.
12. Is talent necessary to become good at drawing?
Natural interest can help, but regular practice and good learning habits are far more important.
13. How do I stay motivated?
Set small goals, keep your old sketches, and compare your progress over time instead of comparing yourself with others.
14. Which drawing supplies are best for beginners?
A simple set of graphite pencils (HB, 2B, 4B, 6B), a sketchbook, an eraser, and a sharpener are enough to get started.
15. What’s the fastest way to improve?
Practice consistently, observe carefully, learn the fundamentals, and review your mistakes after every drawing.
Every great artist was once a beginner who struggled with uneven lines, incorrect proportions, messy shading, and countless imperfect sketches.
The difference between beginners who improve and those who give up isn’t talent—it’s persistence.
Don’t be discouraged by mistakes. Instead, treat every drawing as an opportunity to learn. Focus on building strong fundamentals, practice regularly, observe the world around you, and enjoy the creative process.
Remember, artistic growth doesn’t happen overnight. It happens one sketch, one lesson, and one improvement at a time.
Keep your pencil moving, keep your sketchbook open, and never stop learning.


Leave a Reply