
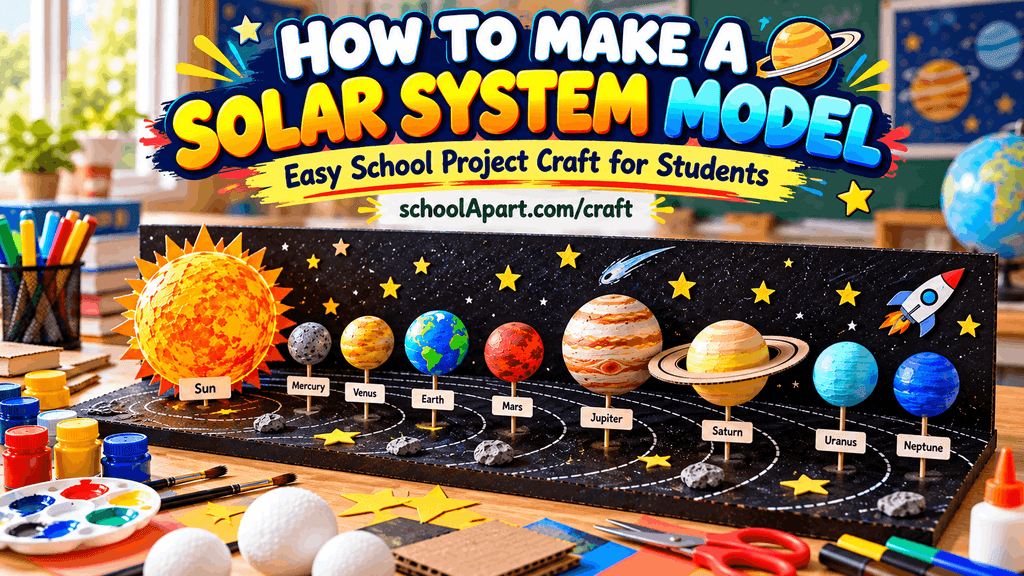
Learn how to make a Solar System model for a school project using simple craft materials. Follow this easy step-by-step guide with ideas and tips.
How to Make a Solar System Model for a School Project
Making a Solar System Model is a fun and educational way for school students to learn about the Sun, planets and their position in our Solar System. It is also a popular choice for school science projects, classroom activities and science exhibitions.
The best part is that you do not need expensive materials to make a simple Solar System model. With cardboard, paper, thermocol or foam balls, colours, glue and a few basic craft supplies, you can create a neat and attractive 3D model at home or at school.
Science Project Craft Ideas for School Students: Simple & Creative Models
In this guide, you will learn how to make a Solar System model step by step, what materials you need, how to arrange the planets and how to make the project informative as well as creative.
What Is a Solar System Model?
A Solar System model is a visual representation of the Sun and the objects that orbit it.
For a school project, the model can show the eight planets in their general order from the Sun:
Mercury → Venus → Earth → Mars → Jupiter → Saturn → Uranus → Neptune
The model does not need to show the actual size or distance of the planets because those differences are far too large to represent accurately in a small school project.
Instead, the main purpose is to help students understand:
- The order of the planets
- The position of Earth
- The difference between inner and outer planets
- The idea of planetary orbits
- Basic Solar System structure
Materials Required
You can make a simple Solar System model using easily available craft materials.
Basic Materials
- Cardboard or thick chart board
- Small thermocol, foam or modelling balls
- Acrylic or poster colours
- Paintbrushes
- Pencil
- Ruler
- Glue
- Scissors
- Black chart paper
- White marker or gel pen
- Thread or thin wire
- Compass
Optional Materials
- Clay
- Aluminium foil
- Coloured paper
- Toothpicks
- Wooden sticks
- Small LED lights
- Recycled cardboard
- Glitter or decorative materials
Try to use materials that are already available at home instead of buying unnecessary supplies.
Step 1: Plan Your Solar System Model
Before starting, decide what type of model you want to make.
You can create:
1. Wall or Chart Model
Planets are arranged on a large flat cardboard or chart.
2. 3D Hanging Model
The planets are suspended using thread or wire.
3. 3D Base Model
The Sun and planets are attached to a cardboard base.
For a school craft project, a 3D cardboard-base model is usually easy to make, display and transport.
Step 2: Prepare the Base
Take a large piece of cardboard.
If you want a space-like background, cover the cardboard with black paper or paint it black.
Allow the paint or glue to dry before continuing.
You can add small white dots to represent stars.
Tip
Do not cover the entire base with too many decorations. The planets and labels should remain clearly visible.
Step 3: Make the Sun
The Sun should be the largest object in your model.
You can use:
- A large foam ball
- A paper ball
- A clay ball
- Crumpled newspaper covered with paper
Paint it using suitable shades to create a bright Sun-like appearance.
Write SUN on a small label or place the label beside it.
Step 4: Make the Eight Planets
Now prepare eight smaller balls for the planets.
You can use foam balls, thermocol balls, clay or paper balls.
Paint each planet with different colours and patterns.
The exact appearance does not need to be scientifically proportional for a basic school craft model. The important thing is to make the planets easy to identify and label correctly.
Planet Order
From the Sun, the order is:
- Mercury
- Venus
- Earth
- Mars
- Jupiter
- Saturn
- Uranus
- Neptune
Step 5: Create the Planet Details
You can make each planet more recognizable by adding simple details.
Mercury
Use a grey or greyish-brown appearance.
Venus
Use yellowish or pale colours.
Earth
Use blue and green to represent oceans and land.
Mars
Use reddish or orange-red colours.
Jupiter
Use bands of different colours.
Saturn
Add a ring around the planet using cardboard or thick paper.
Uranus
Use a pale blue or blue-green appearance.
Neptune
Use a deeper blue appearance.
These are simplified craft representations, so the purpose is identification and learning rather than exact scale reproduction.
Step 6: Make Saturn’s Ring
Saturn is easy to recognize because of its prominent ring system.
To make the ring:
- Draw a large oval on cardboard.
- Cut it carefully.
- Make a suitable opening in the centre.
- Place the ring around the Saturn model.
- Secure it with glue if necessary.
For younger students, an adult can help with cutting.
Step 7: Draw the Planetary Orbits
Use a pencil and compass to draw several curved or circular orbit lines around the Sun.
These lines can help show the general idea that planets travel around the Sun.
You can later trace the lines with a white marker.
Important
The model is not to scale. The spacing and size of the orbits are simplified so that the Solar System can fit on a school-project board.
Step 8: Arrange the Planets
Place the Sun at the centre or on one side of the model, depending on your design.
Then arrange the planets in the correct order:
Sun → Mercury → Venus → Earth → Mars → Jupiter → Saturn → Uranus → Neptune
If you are creating a 3D hanging model, suspend the planets at different positions using thread.
If you are making a base model, attach them to the cardboard using glue, sticks or wire.
Step 9: Add Planet Labels
Clear labels can make a big difference to a school project.
Prepare small labels for:
- Sun
- Mercury
- Venus
- Earth
- Mars
- Jupiter
- Saturn
- Uranus
- Neptune
You can also add one short fact below each planet.
For example:
Earth
Our home planet.
Mars
Often called the Red Planet.
Jupiter
The largest planet in the Solar System.
Keep the text short and readable.
Step 10: Add a Simple Information Section
To make the project more educational, add a small information box.
Example
Our Solar System
The Solar System consists of the Sun and the objects that orbit it. The eight planets are Mercury, Venus, Earth, Mars, Jupiter, Saturn, Uranus and Neptune.
This makes the model useful not only as a craft but also as a science learning project.
Step 11: Make the Model Neat
Before presenting your project, check:
- Are all planets in the correct order?
- Are the labels readable?
- Is Saturn’s ring properly attached?
- Is the cardboard base clean?
- Is the model stable?
- Are there any loose pieces?
- Is the title clearly visible?
A neat and simple project can be more effective than a very complicated model.
Simple Solar System Model Layout
You can follow this basic arrangement:
                    ☀️ SUN

       Mercury
           ○

              Venus
                ○

                  Earth
                   ○

                      Mars
                       ○

                              Jupiter
                                ○

                                   Saturn
                                     ○

                                         Uranus
                                           ○

                                               Neptune
                                                  ○
For a 3D model, you can arrange the planets around the Sun rather than placing them in a straight line.
How to Make a Hanging Solar System Model
If you want to make a more creative version, turn the project into a hanging model.
Materials
- Cardboard or foam balls
- Paint
- Thread
- Wooden stick or cardboard frame
- Glue
- Scissors
- Labels
Method
- Make and paint the Sun and planets.
- Prepare Saturn’s ring.
- Cut different lengths of thread.
- Attach the planets to the threads.
- Attach the threads to a circular or cross-shaped frame.
- Arrange the planets in their correct order.
- Add labels where necessary.
- Hang the model in a safe location.
This type of model can be useful for classroom display or school science exhibitions.
How to Make the Project More Creative
You can improve your Solar System project without making it unnecessarily complicated.
Use a dark background
A black or dark-blue background can create a simple space theme.
Add stars
Small white dots can represent stars.
Add labels
Clear labels make the project easier to understand.
Add planet facts
One short fact per planet can turn the craft into a learning tool.
Use recycled materials
Old cardboard boxes, paper and other reusable materials can be used for the base and decorations.
Add an orbit guide
Simple orbit lines can help explain planetary movement.
Solar System Model Ideas for Different Classes
The complexity of the project can be adjusted according to the student’s age.
For Primary Students
Keep it simple:
- Sun
- Eight planets
- Planet names
- Basic colours
- Simple labels
For Middle School Students
Add:
- Planet groups
- Planet facts
- Orbit explanation
- Inner and outer planets
- 3D modelling
For Older Students
Add more scientific information such as:
- Planet size comparison
- Orbital periods
- Rotation and revolution
- Planet classification
- Distance from the Sun
Remember that the model should match the school’s project requirements and the student’s class level.
Common Mistakes to Avoid
1. Incorrect planet order
Always check the order before attaching the planets.
2. Forgetting Uranus or Neptune
There are eight planets, so make sure all eight are included.
3. Making everything the same size
A school model can simplify sizes, but using different sizes can make the planets easier to distinguish.
4. Overdecorating the model
Too many decorations can make labels difficult to read.
5. Giving incorrect information
Check planet names, order and basic facts before presenting the project.
6. Claiming the model is to scale
A small classroom model cannot accurately reproduce the enormous differences in planetary size and distance.
How to Explain Your Solar System Model at School
If your teacher asks you to explain the project, you can keep the explanation simple.
You can say:
“This is a model of our Solar System. The Sun is at the centre, and the eight planets orbit the Sun. The planets in order from the Sun are Mercury, Venus, Earth, Mars, Jupiter, Saturn, Uranus and Neptune. The model is not to scale, but it shows the basic arrangement of the Solar System.”
Then you can explain a few interesting facts about the planets.
What Students Can Learn from This Project
Making a Solar System model can help students learn:
- The names of the planets
- The order of the planets
- Basic planetary characteristics
- The difference between inner and outer planets
- The concept of orbits
- Basic 3D model-making
- Planning and presentation
- Creative use of craft materials
So, this project combines science learning with craft and creative skills.
Making a Solar System Model for a school project can be a simple and enjoyable way to combine science with creativity.
You do not need expensive materials or a complicated design. With cardboard, paper, modelling materials, colours and a little planning, you can create a useful 3D model that clearly shows the Sun and eight planets.
The most important thing is not how complicated the model looks. Make sure the planet order is correct, the labels are clear, the model is neat and you understand the science behind it.
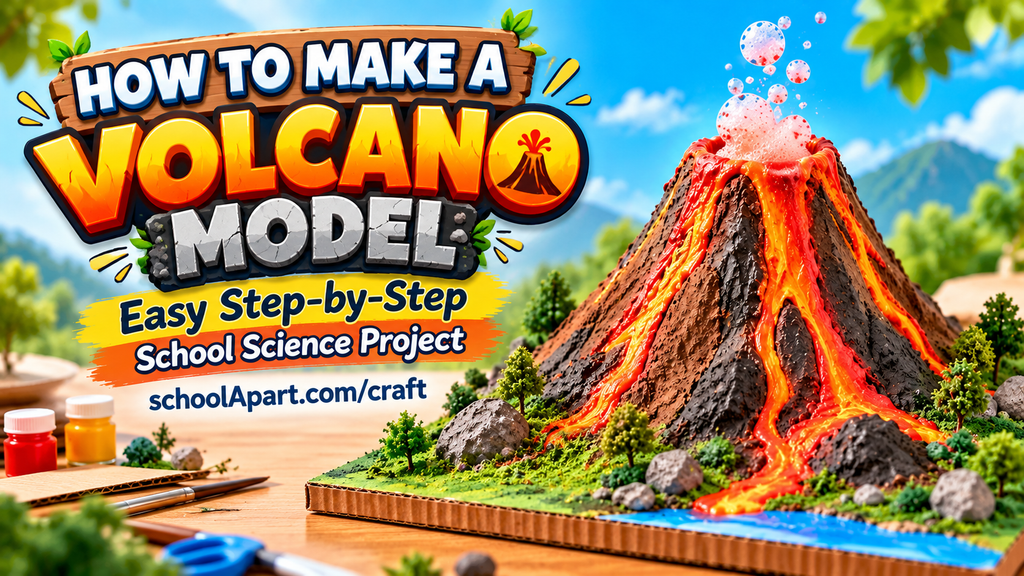
Once you become comfortable with this type of project, you can explore other school science models such as Water Cycle, Volcano, Plant Cell, Rainwater Harvesting and Food Chain models.
FAQ
1. What materials do I need to make a Solar System model?
You can use cardboard, foam or thermocol balls, colours, glue, paper, thread, scissors and markers.
2. How many planets should a Solar System model have?
A basic Solar System model should show the eight planets: Mercury, Venus, Earth, Mars, Jupiter, Saturn, Uranus and Neptune.
3. What is the order of the planets?
From the Sun, the order is Mercury, Venus, Earth, Mars, Jupiter, Saturn, Uranus and Neptune.
4. Can I make a Solar System model with cardboard?
Yes. Cardboard can be used for the base, orbit lines, planet supports and Saturn’s ring.
5. How can I make Saturn’s ring?
Cut an oval ring from cardboard or thick paper and carefully attach it around the Saturn model.
6. Can I use recycled materials for the project?
Yes. Old cardboard, paper, boxes and other reusable materials can be used to make the base and different parts of the model.
7. Does a Solar System model need to be to scale?
Usually, no. A small school model is a simplified representation because the actual planet sizes and distances are enormous.
8. How can I make my Solar System project more attractive?
Use a clean dark background, clear labels, simple orbit lines, neat planet colours and a few short educational facts.

Leave a Reply